• Mason Jars
  • Fixer Upper
  • Crafts
  • Organizing
  • Beauty + Style
  • Recipes
    • Facebook
    • Google+
    • Instagram
    • Pinterest
    • Twitter

Yesterday On Tuesday

The Art Of Everyday Life

  • Home
  • About Me
    • Disclosure Page
    • Privacy Policy
    • Media Kit
  • Videos
  • DIY
  • Decor
  • Holidays
  • Housekeeping
  • Printables

Chalkboard Candelabra

20 Shares
Pin20
Share
Tweet

Candelebra5
 
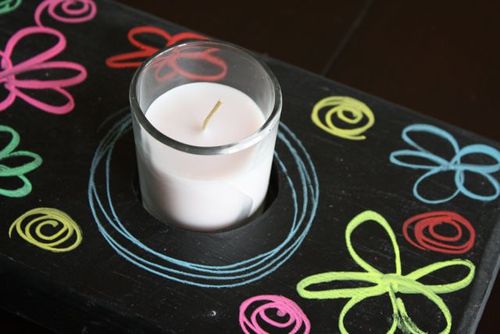
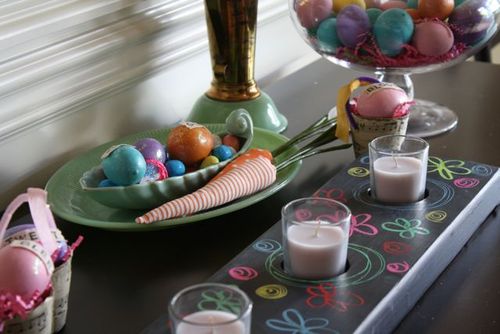
  I'm excited to have friends over this summer for backyard BBQs– and center stage (or at least in the center of the table) will be chalkboard candelabra.

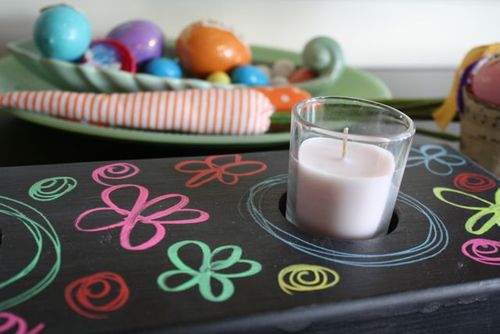
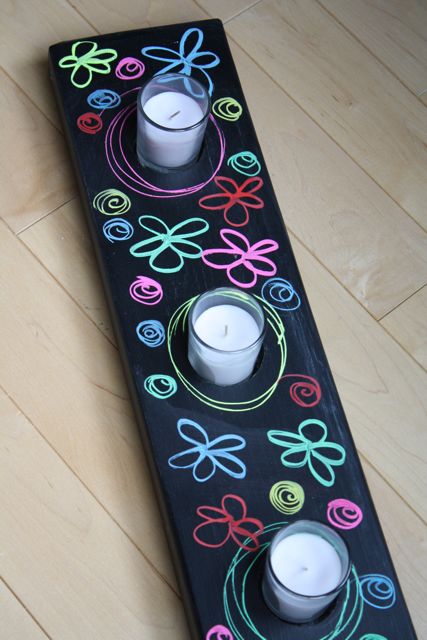
This project brightens up any table– outdoors or indoors. And I look forward to changing the candelabra to tailor it to each event. Some ideas– the names of our guests, hand-drawn pictures, quotes or words. Since we're using chalkboard paint, the possibilities are limitless.

Full Disclosure: My VERY kind and handy Dad helped me out with this. He did the drilling part.

Supplies: A 2 x 6 piece of pine or fir (Actual will be 1-1/2” x 5-1/2”), primer, sandpaper, chalkboard paint (we used Krylon Black Chalkboard Spray Paint), 4 votives (you could use ANYTHING– small vases, up-cycled glass bottles filled with flowers etc) chalk or liquid chalk pens.

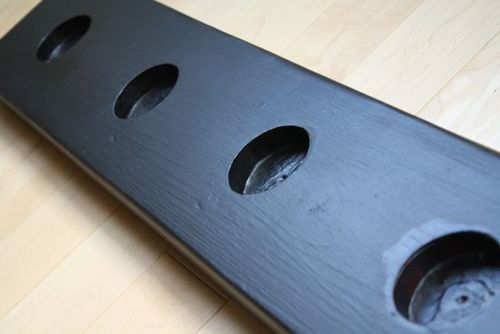
 Step 1: My Dad drilled the holes with a 2-1/8” bit.

*Note from Dad: That is an expensive bit so you might warn readers to make sure of their chimney’s bottom circumference before buying one. A drill press would be ideal but I used a pistol drill.

 Step 2: Sand and prime
Candelebra1
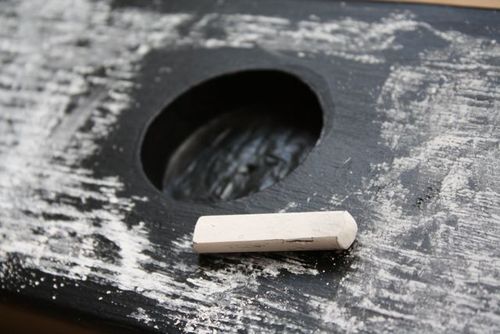
Step 3: Spraypaint each side using long sweeping motions and allow plenty of drying time.
Candelebra2
Step 4: Rub the side of a piece of chalk all over the top of the candelabra to "season" it. Gently wipe it off and you're good to go! Use chalk to write/decorate away.
Candelebra4
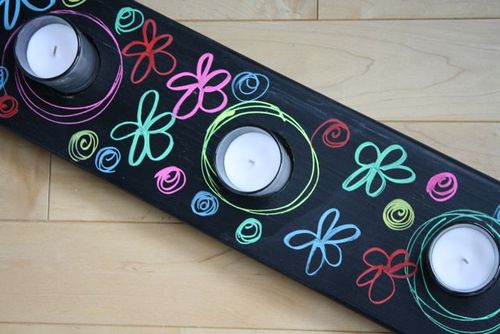
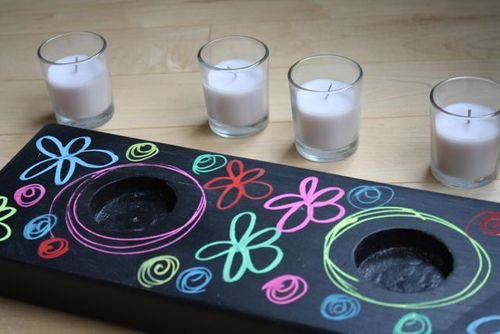
Step 5: Decorate with chalk of liquid chalk pen.

That's it!
Candelelbra 9

Candelebra6

Candelebra7

Candelebra8
Linking Up!

Malia


Crafty Goodness19 Comments

« Wonderful Deer, Wedding, and Coffee Card printables
Shrimp with Garlic and Citrus »

Comments

  1. Pam Holderman says

    April 17, 2011 at 9:11 pm

    Oh I love this… Now only if summer would arrive, or at least winter would leave!

    Reply
  2. Jenn Erickson/Rook No. 17 says

    April 17, 2011 at 10:22 pm

    Absolutely adorable! I love the versatility of the chalkboard background!

    Reply
  3. Rissa says

    April 17, 2011 at 10:22 pm

    Too cute! What a fantastic idea!

    Reply
  4. Tammy @ Not just paper and glue says

    April 18, 2011 at 6:40 am

    This is so adorable!

    Reply
  5. MaryAnn says

    April 18, 2011 at 8:09 am

    Love, love, love it! What a great idea!

    Reply
  6. Sweet Bee Cottage says

    April 18, 2011 at 8:47 am

    Too cute! What a clever idea.

    Reply
  7. Beverly @ FlamingoToes.com says

    April 18, 2011 at 9:30 am

    This is sooooo cute Malia!! I love the idea – you could decorate it to match any party!! So fun!

    Reply
  8. Amber says

    April 18, 2011 at 10:16 am

    Just wanted to show you my take on one of your crafts. http://www.lifelovegreen.com/2011/04/easter-table-decor

    Reply
  9. Steff says

    April 18, 2011 at 10:47 am

    Sweet! I love your doodles, too. So… doodly! :D

    Reply
  10. www.littlebrickranch.com says

    April 18, 2011 at 10:53 am

    Ok – not sure if the last comment went through so this may be a repeat!!
    I love this idea. I have been seeing so many great chalkboard paint projects that I think it is time for me to run out and buy some. Ill be bookmarking this one until I do!!
    If you get a sec, pop on over to Little Brick Ranch to enter the GIVEAWAY!!!

    Reply
  11. Jane Harrah says

    April 18, 2011 at 12:30 pm

    That came out great.

    Reply
  12. Meredith says

    April 18, 2011 at 7:58 pm

    Adorable!!! You are so talented!!

    Reply
  13. Holly L says

    April 19, 2011 at 1:44 pm

    Cute happy and springy! I love this idea…I need that drill bit.

    Reply
  14. Michelle L. says

    April 19, 2011 at 5:33 pm

    This is so cool, what a great idea!!!

    Reply
  15. Miriam says

    April 20, 2011 at 10:59 am

    This is the prettiest thing. I am sure I will have one this summer, I love the idea of making it personal to each occasion. I came over from the simple things project.

    Reply
  16. gail says

    April 20, 2011 at 2:58 pm

    Malia, Your dad did a great job drilling, but your doodling is what REALLY makes this project! I could never make one look so darn cute!
    gail

    Reply
  17. Kristina says

    April 21, 2011 at 4:55 pm

    Super cute!

    Reply
  18. Brittany says

    April 22, 2011 at 7:09 am

    What a creative idea! I love the thought of using it for an outdoor party. visiting from 504 Main :)

    Reply
  19. Janna says

    April 26, 2011 at 7:32 am

    That’s great! such a nice innovative way to display some candles with style and ease!

    Reply

Leave a Reply Cancel reply

Your email address will not be published. Required fields are marked *

This site uses Akismet to reduce spam. Learn how your comment data is processed.

  • Facebook
  • Google+
  • Instagram
  • Pinterest
  • Twitter
I love finding ways to make every day special through DIY projects, decor ideas and recipes. Proud to be a wife, mom, and hometown Seattle girl. Catch me on KOMO News at 4pm and on Seattle Refined.

As Seen In

Stay up-to-date with the latest posts!

Find Me On Facebook

Project Galleries

Latest Pins

Visit Malia Martine Karlinsky's profile on Pinterest.

Copyright © 2021 · Savory theme by Restored 316

Copyright © 2021 · Savory Theme on Genesis Framework · WordPress · Log in

Welcome to Yesterday on Tuesday!
Sign up for my weekly newsletter and never miss my cheap and chic projects, delicious recipes and free printables!
Your information will *never* be shared or sold to a 3rd party.