• Mason Jars
  • Fixer Upper
  • Crafts
  • Organizing
  • Beauty + Style
  • Recipes
    • Facebook
    • Instagram
    • Pinterest
    • Twitter
    • YouTube

Yesterday On Tuesday

The Art Of Everyday Life

  • Home
  • About Me
    • Disclosure Page
    • Privacy Policy
    • Media Kit
  • Videos
  • DIY
  • Decor
  • Holidays
  • Housekeeping
  • Printables

b mine valentines

206 Shares
Pin206
Share
Tweet

Hi There! How was the weekend? We had time some quality with friends, a family bday lunch, birthday parties, basketball games, did writing for work and playdates. But I still found time to get my craft on.

 I REALLY love Valentine's Day. Especially making valentines.
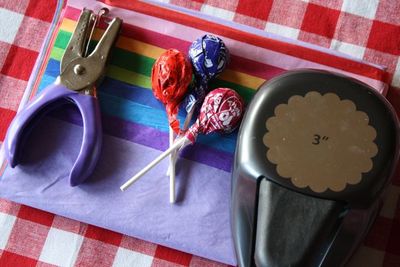
B Mine Valentines - Yesterday on Tuesday #valentines #kidsvalentines #valentinesday
Supplies: tissue paper, whole punch, 3" inch scallop paper punch, lollipops
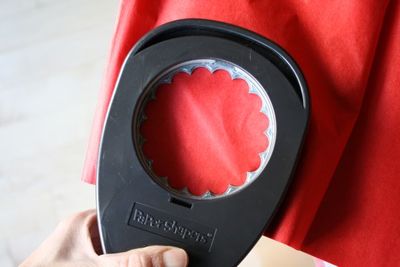
B Mine Valentines - Yesterday on Tuesday #valentines #kidsvalentines #valentinesday
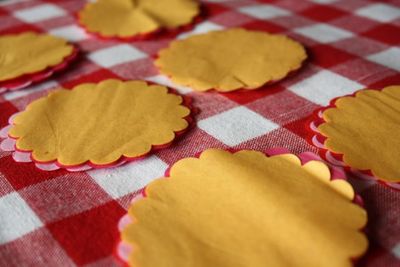
Punch out 10 layers of tissue paper. 

B Mine Valentines - Yesterday on Tuesday #valentines #kidsvalentines #valentinesday
You'll need 20 layers of the scallops for each lollipop.
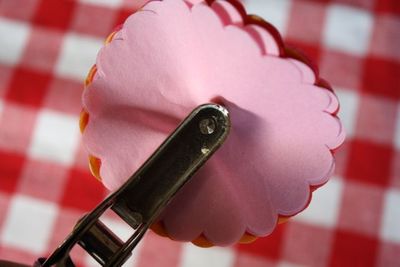
B Mine Valentines - Yesterday on Tuesday #valentines #kidsvalentines #valentinesday
Punch a hole in the middle of your layers.
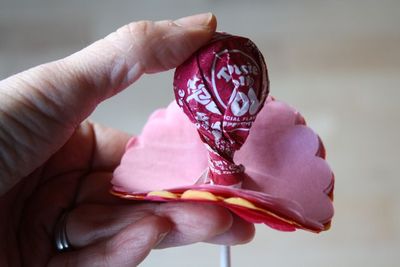
B Mine Valentines - Yesterday on Tuesday #valentines #kidsvalentines #valentinesday
Pop your lollipop through. You may want to trim the bottom of the wrapper off.
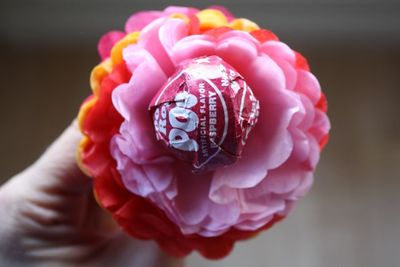
B Mine Valentines - Yesterday on Tuesday #valentines #kidsvalentines #valentinesday
Crinkle up the petals. Hold that thought– (and that flower).
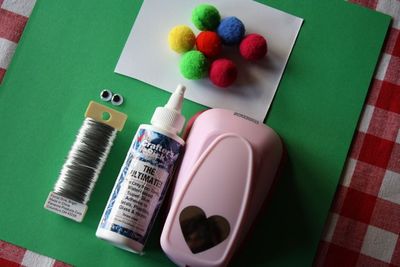
 
B Mine Valentines - Yesterday on Tuesday #valentines #kidsvalentines #valentinesday 

Supplies Needed for the "b": Green and white cardstock, heart punch, googly eyes, crafters glue, florist's wire, a saucer (for tracing a leaf), pom poms. Letter stickers for "b mine."
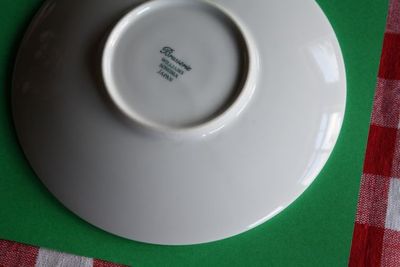
B Mine Valentines - Yesterday on Tuesday #valentines #kidsvalentines #valentinesday
The edge of the saucer makes a good "leaf"
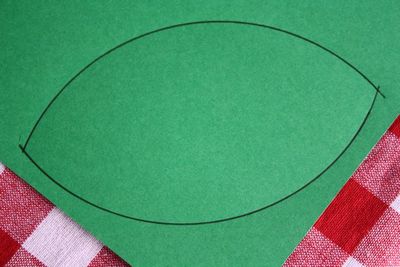
B Mine Valentines - Yesterday on Tuesday #valentines #kidsvalentines #valentinesday
It's pretty long because you need room for letter stickers.
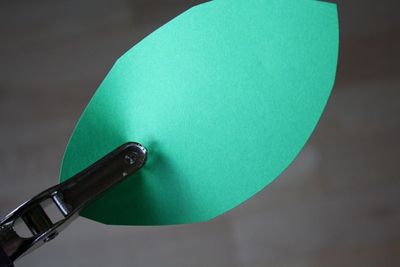
B Mine Valentines - Yesterday on Tuesday #valentines #kidsvalentines #valentinesday
 Punch a hole in your leaf.

B Mine Valentines - Yesterday on Tuesday #valentines #kidsvalentines #valentinesday
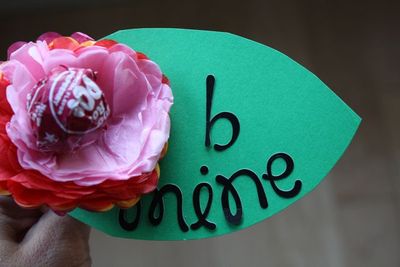
Add the stickers…

B Mine Valentines - Yesterday on Tuesday #valentines #kidsvalentines #valentinesday
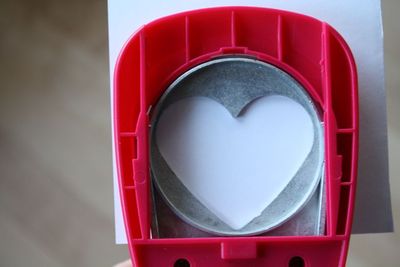
To make the "b", punch a heart out of white cardstock.
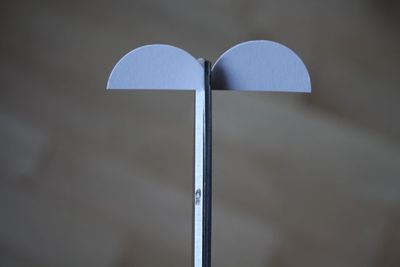
B Mine Valentines - Yesterday on Tuesday #valentines #kidsvalentines #valentinesday

Snip off the top and cut it in half to make wings.
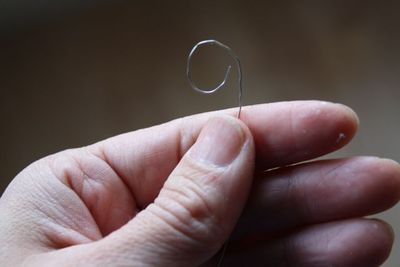
B Mine Valentines - Yesterday on Tuesday #valentines #kidsvalentines #valentinesday
Cut two small pieces of wire, about 3 inches and curl around pencil to make antennae. Stick them into pom pom.

.
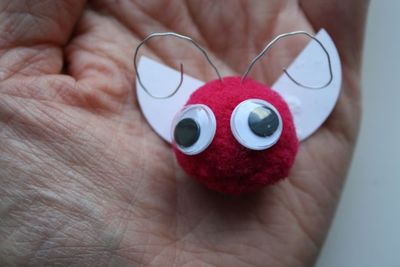
B Mine Valentines - Yesterday on Tuesday #valentines #kidsvalentines #valentinesday

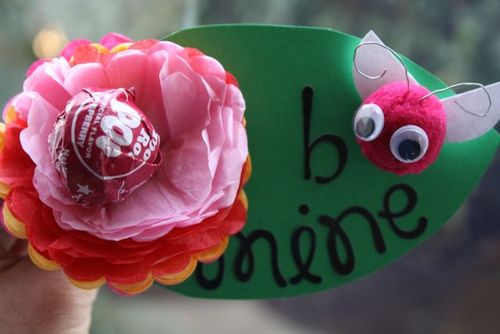
Glue the googly eyes and wings on.

 
B Mine Valentines - Yesterday on Tuesday #valentines #kidsvalentines #valentinesday
 Lollipop project inspired by Scrapbooks Etc.

Linking up here.

Malia

Crafty Goodness23 Comments

« Free Valentine’s Day Coupon Book
DIY Club Life & Home E-zine »

Comments

  1. Jessica @ Two Shades of Pink says

    January 23, 2011 at 5:00 pm

    I love this! So incredibly sweet and simple. Your ideas are always so fabulous. :)

    Reply
  2. aubrey says

    January 23, 2011 at 5:36 pm

    This is so cute. First I thought just the flower was adorable, and then it kept getting better :)

    Reply
  3. Christy says

    January 23, 2011 at 6:16 pm

    Just precious!

    Reply
  4. Ellie says

    January 23, 2011 at 6:21 pm

    Hello,
    I’m a new fan to your blog from the Social Parade on Friday Blog Hop. Very nice Blog. Hoping to meet some new friends and gain some new followers so if you get a minute please stop by and follow back.
    https://alittleoftheother.com
    Have a super week,
    Ellie

    Reply
  5. Linda says

    January 23, 2011 at 9:05 pm

    If that is a very cute Valentine then I don’t know what is!! Darling. Thanks for showing how to make it also. Linda

    Reply
  6. Emily says

    January 23, 2011 at 9:43 pm

    I love it! What a cute idea!

    Reply
  7. Granny's Attic says

    January 23, 2011 at 9:46 pm

    Very cute! Great idea for the kids to take to school. Blessings, Vicky

    Reply
  8. Gwen @ Gwenny Penny says

    January 24, 2011 at 5:40 am

    These are adorable. I love the addition of the little bug. The flowers are just beautiful. Nice!

    Reply
  9. Kathie says

    January 24, 2011 at 6:20 am

    So cute! I was impressed with just the flower!

    Reply
  10. MD says

    January 24, 2011 at 8:44 am

    superrrrrrrrrrrr
    bravo md

    Reply
  11. Lisa Brown says

    January 24, 2011 at 12:07 pm

    Loveee!

    Reply
  12. Theanne Crossett says

    January 24, 2011 at 1:06 pm

    Adorable!

    Reply
  13. PickleLady says

    January 24, 2011 at 6:10 pm

    We did these last year, but without the bug. I wish I had thought of the bug…
    Love them!

    Reply
  14. Vicki Chrisman says

    January 24, 2011 at 11:43 pm

    So cute!

    Reply
  15. Jill says

    January 25, 2011 at 4:16 am

    How gorgeous! Especially the little bug! So cute!
    Thanks so much for linking to A Round Tuit! Hope you’re having a fabulous week!
    Jill @ Creating my way to Success
    https://jembellish.blogspot.com/

    Reply
  16. Denise Kline says

    January 26, 2011 at 5:39 am

    How cute! I love it! Thanks for sharing!

    Reply
  17. Renee Ann says

    January 26, 2011 at 12:11 pm

    Adorable! I’m visiting from the blog hop.

    Reply
  18. Meg says

    January 26, 2011 at 1:01 pm

    I love the little bug! I’m your newest follower. I’d love for you to follow back!
    https://theloops13.blogspot.com

    Reply
  19. Freebies Mom says

    January 26, 2011 at 1:14 pm

    Hello! I’m so happy that I discovered
    your wonderful blog at the hop.
    I am happily, a new follower.
    Freebies 4 Moms
    https://casinofreebies3.blogspot.com

    Reply
  20. Meredith says

    January 28, 2011 at 12:21 pm

    So Cute!! I’m going to see if I can get Anika to agree to make these for her class Valentines. Love it!! (In truth they may not be as elaborate, but we might go for a basic flower around a lollipop.)

    Reply
  21. creativejewishmom/sara says

    February 3, 2011 at 4:50 am

    Adorable! And so glad you have the scalloped punch to make the flowers I posted about today!
    Thanks so much for sharing on Craft Schooling Sunday!

    Reply
  22. Christine says

    February 16, 2011 at 10:08 am

    What a cute and easy idea! Thanks for the tutorial!

    Reply
  23. Brenda says

    January 31, 2012 at 3:32 pm

    Stumbled onto this site-What great,neat craft ideas. I will definitely be using these crafty ideas!!
    Thank You!!

    Reply

Leave a Reply Cancel reply

Your email address will not be published. Required fields are marked *

This site uses Akismet to reduce spam. Learn how your comment data is processed.

  • Facebook
  • Instagram
  • Pinterest
  • Twitter
  • YouTube
Hi, I’m Malia. I love finding ways to make every day special through DIY projects, decor ideas, and recipes. I’m also a journalist with a passion for positive stories.

As Seen In

Stay up-to-date with the latest posts!

Find Me On Facebook

Project Galleries

Latest Pins

Visit Malia Martine Karlinsky's profile on Pinterest.

Copyright © 2023 · Savory theme by Restored 316

Copyright © 2023 · Savory Theme on Genesis Framework · WordPress · Log in

Welcome to Yesterday on Tuesday!
Sign up for my weekly newsletter and never miss my cheap and chic projects, delicious recipes and free printables!
Your information will *never* be shared or sold to a 3rd party.