Guest Postage: The Speckled Dog

Howdy, Yesterday on Tuesday readers!
I'm Kristi from The Speckled Dog and I'm your guest poster today. This is like, my first guest post ever and I was totally excited when Malia contacted me about guesting. I got even more excited when she asked that I share my glazing tutorial with you guys.
If you've never tried glazing before, you're in for a good time. It's a great way to transform a tired thrift store find into something fabulous. I'd like to start out by saying that I'm in no way any kind of professional on this. I'm just here to show you what works for me.
Once you start glazing, you'll likely to find other tips and techniques that work better for you. So if something I've told you doesn't work out, please don't come beat me up. Kidding, kidding! Seriously, though, I hope someone is able to use what I'm sharing to create beautiful pieces just like I feel I've done.
Alright, let's get this show on the road!
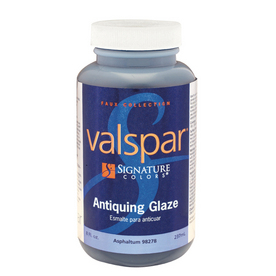
There are several types of glaze out there and the most popular that I've seen are the tintable glazes. I chose not to go that route because I didn't want to invest too much money in something that I wasn't even sure would work. I ended up getting this small (half-pint) bottle of Valspar Antiquing Glaze in Asphaltum, which is basically black.


Step 1: Find your object. I recommend using something that isn't all that important to you on your first try, just in case it doesn't work out. Use something from around the house or head on out to a thrift store and get something cheap, but also something you like. Make sure it's clean before you paint it.

Step 2: Paint your item. I just use acrylic craft paint. My favorite brand is Folk Art. Since it's flat, I don't prime. You may choose to prime, I don't. I usually do at least 2 coats of paint. I sometimes do more depending on how well it's covering. You don't have to get full covereage because the glaze will most likely cover any flaws, but I do try to get mine as evenly covered as possible. Anything with grooves, will just be getting glaze in those spots so don't sweat it if you can get it fully painted. The bottle of glaze says to make sure you let your item dry at least 24 hours. I don't usually do this. I wait a few hours and then get to it.

Step 3: Gather your glazing supplies:
Step 4: Start glazing

glaze on

glaze off

That's it!! You're all finished and you hopefully have given an ordinary object an awesome makeover.

It cost me around $9. Even that seemed a little pricey to me, but I found that with glaze, a little goes a long way. I've only used 1/4 of the bottle and so far, I've done all of these projects.
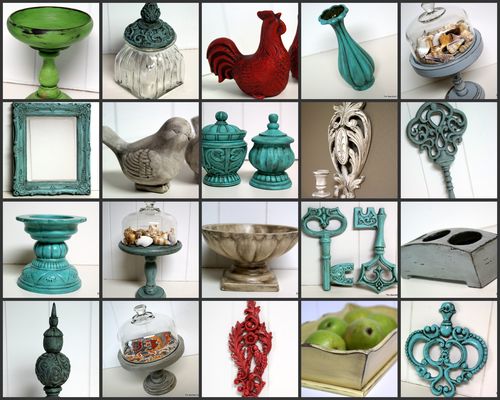
Whew! That's a lot! I didn't realize just how much that little bit of glaze had done until I went looking for photos. Now that you can see just how far you can go with just a little glaze, let's get down to the nitty-gritty. The how to.

Step 1: Find your object. I recommend using something that isn't all that important to you on your first try, just in case it doesn't work out. Use something from around the house or head on out to a thrift store and get something cheap, but also something you like. Make sure it's clean before you paint it.

Step 2: Paint your item. I just use acrylic craft paint. My favorite brand is Folk Art. Since it's flat, I don't prime. You may choose to prime, I don't. I usually do at least 2 coats of paint. I sometimes do more depending on how well it's covering. You don't have to get full covereage because the glaze will most likely cover any flaws, but I do try to get mine as evenly covered as possible. Anything with grooves, will just be getting glaze in those spots so don't sweat it if you can get it fully painted. The bottle of glaze says to make sure you let your item dry at least 24 hours. I don't usually do this. I wait a few hours and then get to it.
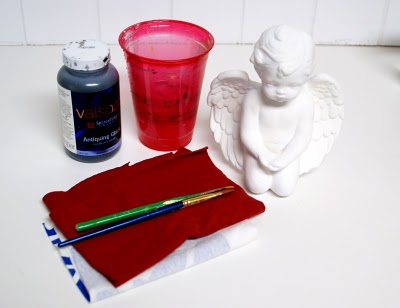
Step 3: Gather your glazing supplies:
your item
glaze
paint brushes (make sure at least one is one of those tiny pointy ones)
soft cloths (I use those t-shirt rags that Goodwill sells as cleaning cloths)
plastic cup of water (to rest your brush in)
Step 4: Start glazing
Shake your bottle of glaze to make sure it's mixed well.
Working in small sections at a time, brush on some glaze, making sure to get down in any nooks and crannies. Then take a dry cloth and start wiping the glaze off. Repeat the last two actions until your whole piece has been glazed.
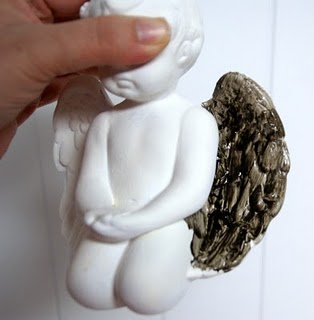
glaze on

glaze off
TIPS
*Don't rub too hard because you'll probably find yourself rubbing the base paint off. If you do this, you can always go back and touch it up. I'm not sure if this is something priming or letting the painted piece cure the full 24 hours will help, but I'm just too impatient for all of that. I've just learned to be very careful when wiping. I usually don't have a problem with this while doing wood pieces so it's probably a priming/curing issue. Anyway, just do what you think is best.
*You'll probably find some places where the glaze has really settled into some of the crevices. Like, settled a little too much. This is where that little brush comes in handy. Just dip it into your cup of water and then use it to break up some of the pooled glaze. Use your cloth to wipe away the watery excess.
*If you don't like the way a section looks, you can use some water on a brush and your dry cloth to remove some of the glaze (it's workable for up to 15 mins). Then just reglaze that section.
*Don't worry about messing the piece up by holding it by an already glazed section. I do it all the time and it hasn't been an issue. You'll get some glaze on your hand, but it washes right off.
*I've found on some of the bigger pieces that I needed more than one cloth. I guess when the glaze builds up on the cloth, it doesn't work as well. Just be prepared.
* Sometimes a wait a few hours and then go over the piece with some Polycrylic, but I don't always since the glaze gives the piece a nice sheen itself.

That's it!! You're all finished and you hopefully have given an ordinary object an awesome makeover.
Thanks Kristi!
Visit The Speckled Dog for more great ideas and Kristi's etsy shop for some very cute finds.


These glazing instructions are so great Kristy and I am amazed by the finished angel. It looks so old and chic – I love it!!
Thanks for the tut!