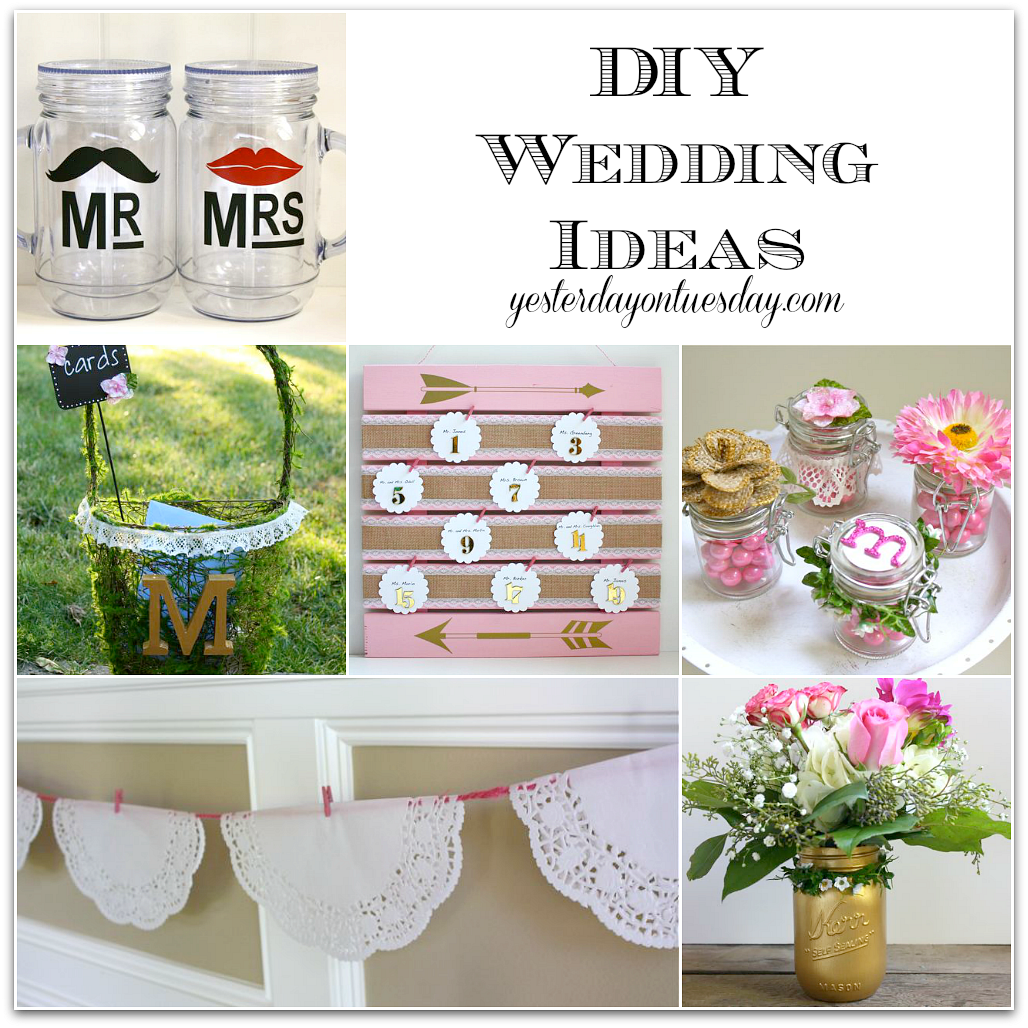
DIY Wedding Ideas
Catch these projects LIVE on Seattle’s KOMO-TV Monday June 23rd at 4pm
According to a recent survey conducted by the wedding website The Knot, the average cost of a wedding is a whopping $30,000! Before you shell out this big bucks for your big day– consider creating some of your wedding must-haves yourself. Not only can you save money but crafting can be a great stress reducer!
DIY Wedding Ideas
DIY Wedding Reception Seating Chart
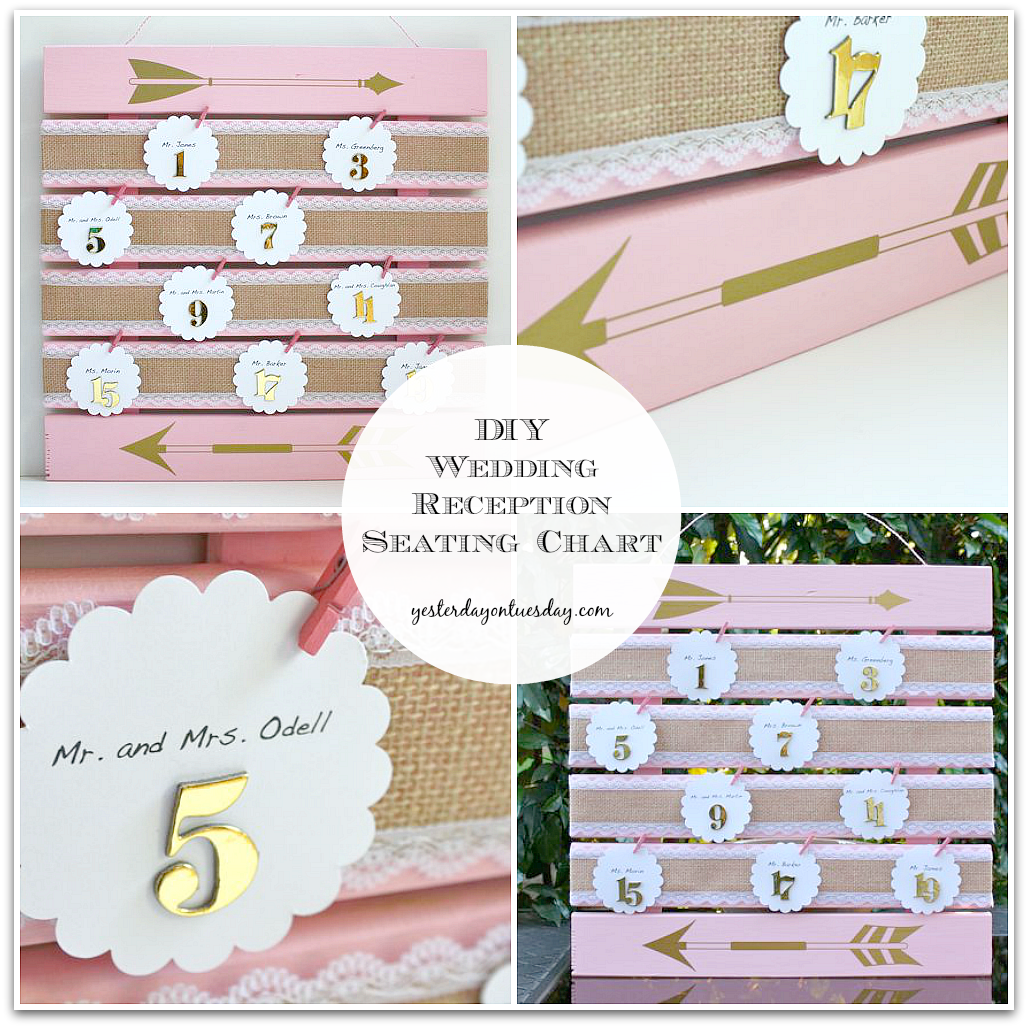
Why spend a bundle on a seating chart for your wedding guests when you can make one in an afternoon?
Materials: Pallet Sign, DecoArt Americana Decor Chalky Finish Paint in Innocence, Arrow Vinyl from Decorating Your Life, Clothespins from Canvas Corp, Lace Ribbon from Designer’s Excellence, white cardstock, Gold Number Stickers from American Crafts Thickers and a paintbrush and a stapler. Use a paper punch or the Die Cut Center at Ben Franklin to make the table tags. All materials from Ben Franklin Crafts and Frames in Redmond.
Step 1: Paint the pallet sign and wire handle with Chalky Finsh paint. It will take 3-5 coats.
Step 2: After paint to completely dry, add the gold vinyl arrows (follow package instructions).
Step 3: Add lace ribbon and secure on either side of sign with staples.
Step 4: Use a paper punch or the Die Cut Center at Ben Franklin to make the table tags. Add names with word processing function on computer or hand write. Add gold number stickers.
Step 5: Secure table tags to lace with clothespins.
Mr. and Mrs. Mugs
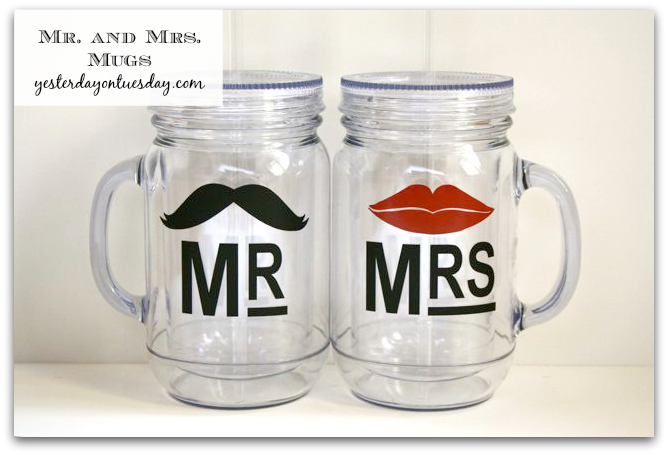
Getting married can be so fun… and exhausting! Treat the bride and groom to a gift they’ll LOVE at the wedding– Mr. and Mrs. Mugs that they can sip water from during the celebration.
Materials: Plastic mugs from Darice and “Mr. and Mrs.” vinyl from Decorating Your Life. All materials from Ben Franklin Crafts and Frames in Redmond.
Step 1: Place vinyl face up on a flat, hard surface. Burnish vinyl with a credit card.
Step 2: Flip over and peel backing off.
Step 3: Position vinyl on plastic mug.
Step 4: Using a credit card, burnish vinyl to surface.
5. Starting in a corner, peel back the masking tape layer at a sharp angle.
Wedding Card Basket
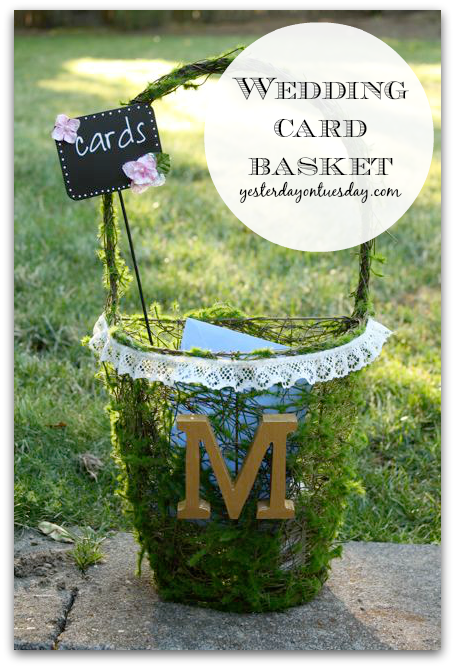
It’s a cinch to assemble a lovely basket for wedding guests to place cards.
Materials: Moss Basket, Wooden Letter, Lace Ribbon, Metal Chalkboard Sign, Chalkboard Paint Pen, DecoArt Dazzling Metallics in Glorious Gold paint, Small Flowers from Petaloo and hot glue. All materials from Ben Franklin Crafts and Frames Redmond.
Step 1: Paint the wooden letter gold. May take a few coats to get the desired look.
Step 2: Use hot glue to attach lace to basket.
Step 3: Write “Cards” on the metal sign and use hot glue to embellish with flowers.
Step 4: Attach letter to front of basket with hot glue.
Wedding Favors
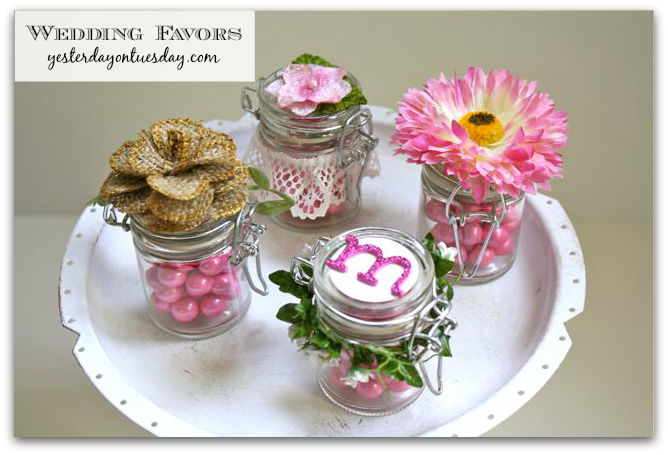
Making your own wedding favors is a great way to keep wedding costs down.
Materials: Glass Flip Lid Jars from David Tutera Casual Elegance (they come in sets of 4), Celebration Sixlets by SweetWorks, Small Burlap Flower, green leaf ribbon, DecoArt Dazzling Metallics in Glorious Gold paint, Small Pink Flowers from Petaloo, Faux Flower, Pink Letter Stickers from American Crafts, white cardstock, White Flower and Leaf Wire from Allstate Floral, small circle paper punch and hot glue. All materials available at Ben Franklin Crafts and Frames in Redmond.
Directions, Clockwise.
1. Small Pink Flower: Hot glue leaves and small flowers on top of jar. Add lace around middle. Fill with candy.
2. Large Flower: Remove a large flower from bunch of plastic flowers. Make the bottom as flat as possible. Use hot glue to secure to lid. Fill with candy.
3. Monogram Jar: Punch a small circle out of cardstock. Add letter. Use hot glue t to attach to lid. Twist a piece of the flower wire around jar. Add candy.
4. Burlap Flower: Paint gold on edges of burlap flower and let dry. Flatten bottom of flower as much a possible. Got glue a snippet of leaf ribbon to bottom of jar and place burlap flower on top. Add candy.
Doily Banner
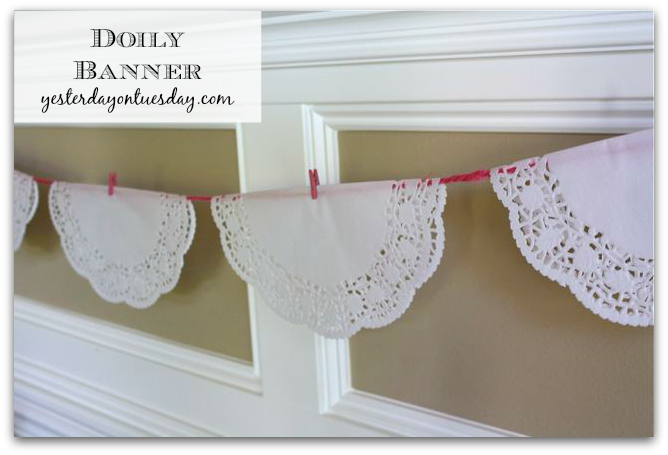
Whip up this rustic Doily Banner in minutes.
Materials: 10″5 inch Doilies from Unique, Hot Pink Cord from Canvas Corp, Clothespins from Canvas Corp, double sided tape. All materials available at Ben Franklin Crafts and Frames in Redmond.
Step 1: Fold doilies in half.
Step 2: Run cord from doilies and secure with double sided tape.
Step 3: Place clothespin on top.
Gold Mason Jar Centerpiece
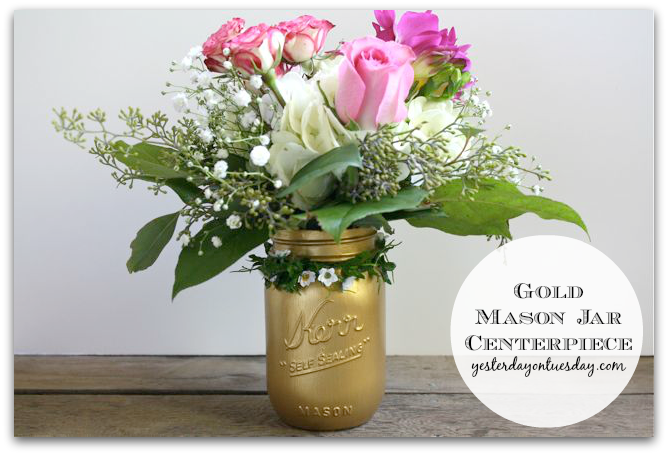
Why blow your wedding budget on fancy centerpieces when you can make your own stunning Gold Mason Jar Centerpieces?
Materials: Mason Jars, DecoArt Dazzling Metallics in Glorious Gold paint, White Flower and Leaf Wire from Allstate Floral. All materials available at Ben Franklin Crafts and Frames in Redmond.
Step 1: Paint the Mason Jars gold (will take 3-5 coats).
Step 2: Twist floral wire around top of jar.
Step 3: Add fresh flowers.
Sharing at Uncommon Designs, Craft-o-Maniac, I Should Be Mopping the Floor, A Bowl Full of Lemons, Kathe with an E, The Girl Creative, Domestically Speaking, Live Laugh Rowe, Thirty Handmade Days, Carolyn’s Homework, Tatertots and Jello, Shaken Together Life, Flamingo Toes and The Cards We Drew.
I LOVE the seating chart! What an adorable idea. Pinning + sharing with my invitation clients. :)
Michelle @ Elegance & Enchantment recently posted…Motivation Monday – Free Printable – Keep your eyes on the stars and your feet on the ground
Thanks Michelle, that’s so nice of you! Hope you are having a great summer!
I love this collection of ideas. I think my favorite is the favor jars. I’ve noticed more and more brides planning their own wedding reception decor. I think it adds such a personal touch, and why not keep costs down any way you can?
Sharon Hines recently posted…it’s the little things: laundry symbol chart
That center piece is gorgeous, Malia! Wonderful collection!
Julie recently posted…Top 12 Summer Grilling Recipes | Redhead’s Kitchen