Stylish Storage Solutions
Catch these ideas LIVE on KOMO-TV on Monday January 5th at 4pm
Stylish Storage Solutions
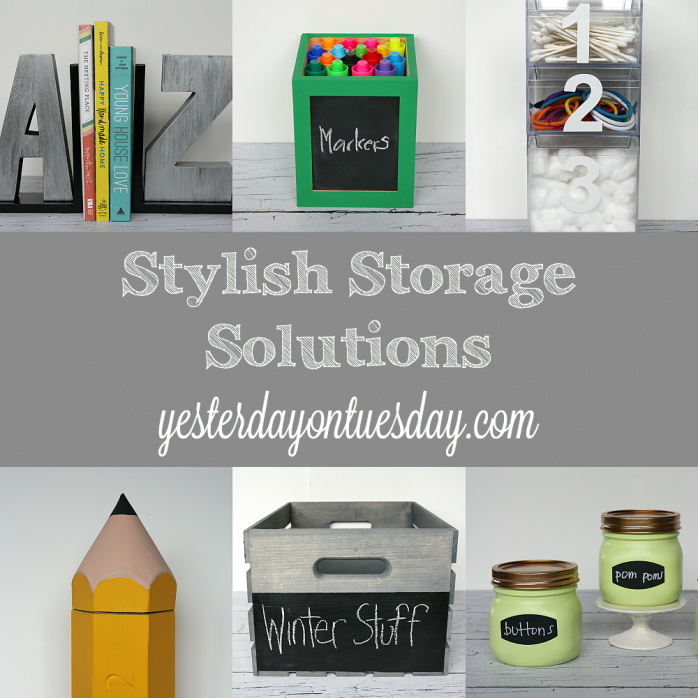
January is the perfect time of year to become better organized. Here are so DIY Stylish Storage Solutions for your living room, bathroom, desk, kid’s rooms and more!
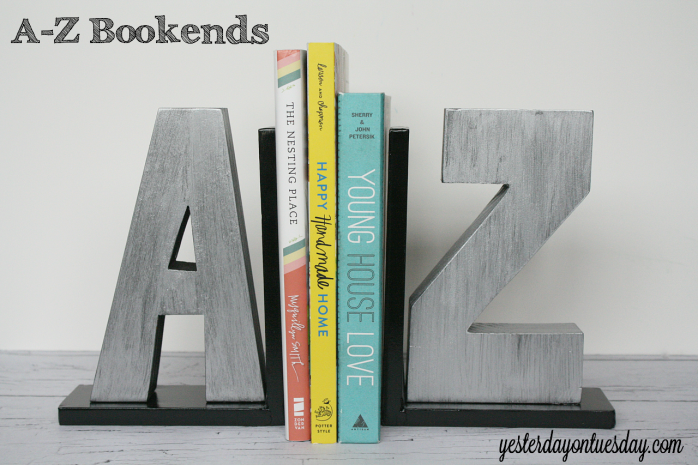
A-Z Bookends
Keep your favorite books displayed with these customizable bookends. Ours are silver but you could easy use the same technique to create white book ends for your cookbooks in the kitchen or any color for a kid’s room.
Supplies: Wood A and Z letters (mine are 8″ tall), two metal bookends, black spray paint, DecoArt Dazzling Metallic Acrylic Paint in Shimmering Silver and hot glue. All craft materials from Ben Franklin Crafts and Frames in Redmond.
Directions
1. Spray paint the metal book ends black and set aside.
2. Spray paint the wood letters black. It will take you a few coats as the wood absorbs the paint.
3. When letters are dry, give them one coat of the silver paint so that the black paint still shows through a bit.
4. Use hot glue to attach the letters to the book ends.
5. Display your books!
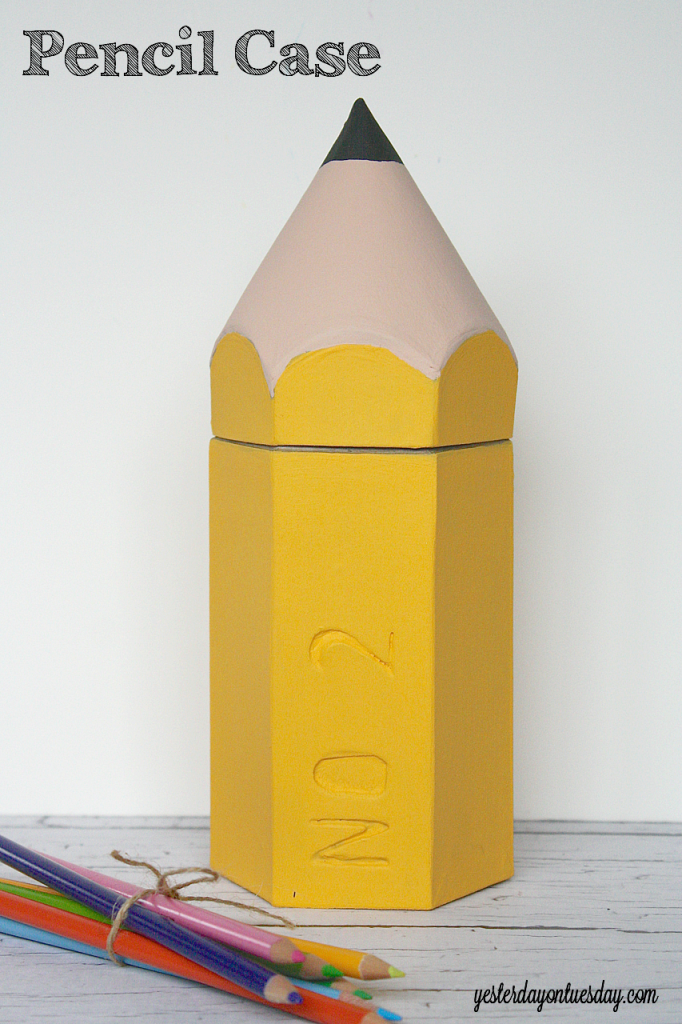
Pencil Case
Those pencils, pens and crayons can be hard for kids to corral. This cute pencil case will do the trick.
Supplies: Cardboard/Paper mache “pencil” shaped case, Deco Art Americana Decor paint in Primary Yellow, Flesh Tone and Lamp (Ebony) and paintbrushes. All craft materials from Ben Franklin Crafts and Frames in Redmond.
Directions
1. Take the “pencil” apart. Following the curve of the “pencil,” paint the lower part of the top half yellow.
2. Paint the bottom half of the “pencil” yellow.
3. Let the paint dry between coats (you made need 3-4 coats).
4. Paint the top half of the top portion in the flesh tone, letting it dry between coats (you may need 3-4 coats).
5. Paint the tip of the “pencil” black.
6. Fill with pencil, pens, crayons or other art supplies.
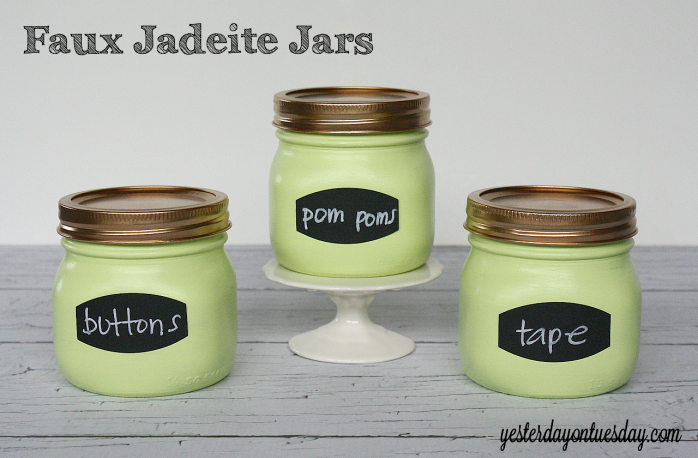
Faux Jadeite Jars
Jadeite or “jadeite” is that milky-green glassware, much of which was made in the 1940’s. Once very affordable, vintage jadeite is now fairly expensive. You can get the look for less with these Faux Jadeite Jars.
Supplies: Mason Jars, gold metallic spray paint, DecoArt Americana Multi-Surface Stain in Melonball (one bottle of paint was enough to do multiple coats on 3 jars) and chalkboard labels. All craft materials from Ben Franklin Crafts and Frames in Redmond.
Directions
Step 1: Clean and dry the jars.
Step 2: Spray Paint the lids gold
Step 3: Turn the jars upside down and paint them, starting with the bottom, then the sides. Let the paint dry between coats. It will take 4-5 coats of paint to get complete coverage.
Step 4: Apply chalkboard labels and fill with anything from desk supplies to Q-Tips and cotton balls.
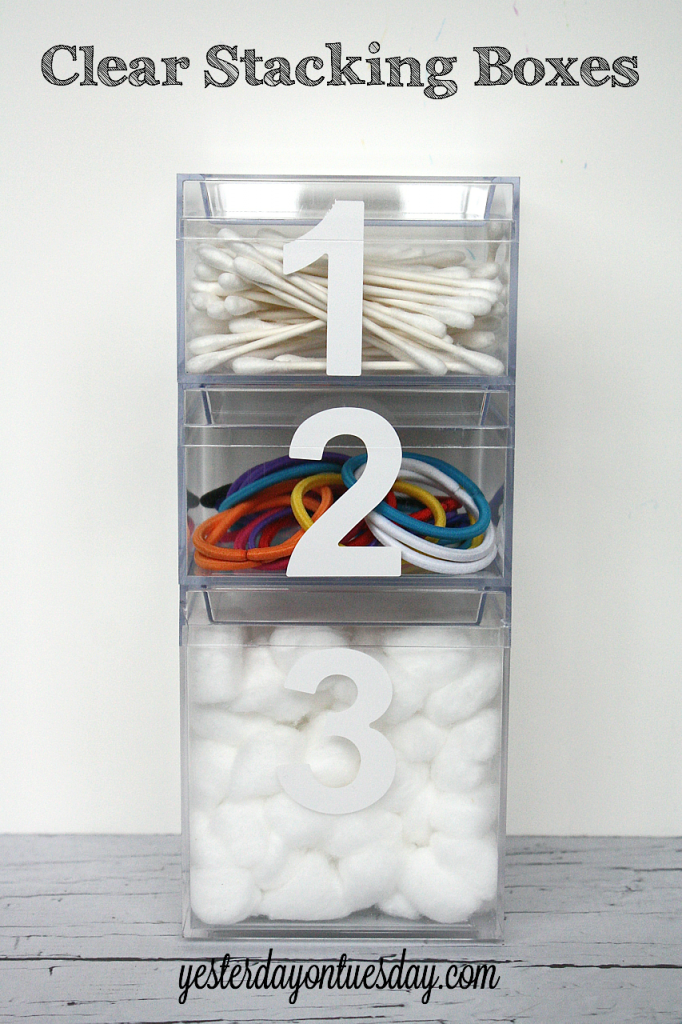
Clear Stacking Boxes
If you’re short on space, stacking boxes can be a great way to go!
Supplies: Clear Plastic Stacking Boxes. I used two that were 2 1/2″ in height and 4″ in width, and one larger box that was 4 1/2″ in height and 4″ in width. You might also want to use stickers, chalkboard labels or a paint pen to label what’s inside. All craft materials from Ben Franklin Crafts and Frames in Redmond.
Directions: Fill the boxes and label them!
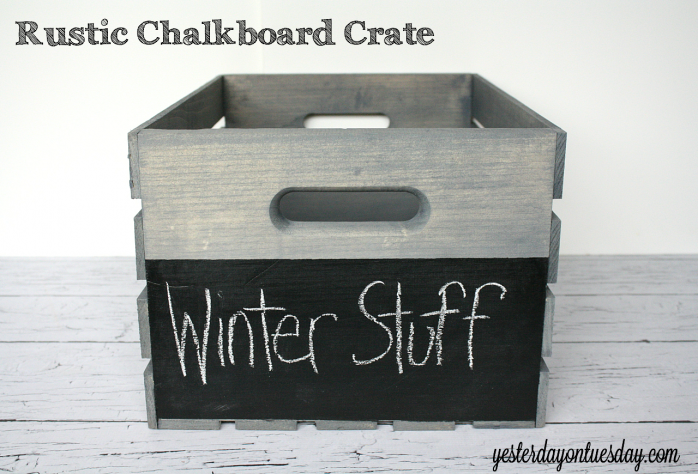
Rustic Chalkboard Crate
Transform a plain crate into a box for storage, or use a bunch to make a cheap and chic storage unit.
Supplies: Wooden Crate, Rust-o-leum Ultimate Wood Stain in Weathered Gray, Folk Art Chalkboard Paint in Black. All craft materials from Ben Franklin Crafts and Frames in Redmond. You’ll also need a paintbrushes, masking tape and an old rag for the stain and of course… chalk!
Directions
1. Following the instructions on the jar of stain, paint the crate weathered gray in sections. Let the stain sit for about two minutes and wipe it off with the rag. This will give you that beautiful weathered look.
2. After the stain is completely dry, tape off an area the shape of a rectangle for the chalkboard paint. I used the chalkboard paint on one end of the crate.
3. Paint the area with the chalkboard paint. It may take three or more coats to get full coverage.
4. When the chalkboard area is dry, rub the side of the chalk all over it and wipe if off. That’s how you “season” the area for use.
5. Label the crate with whatever you want to store in there.
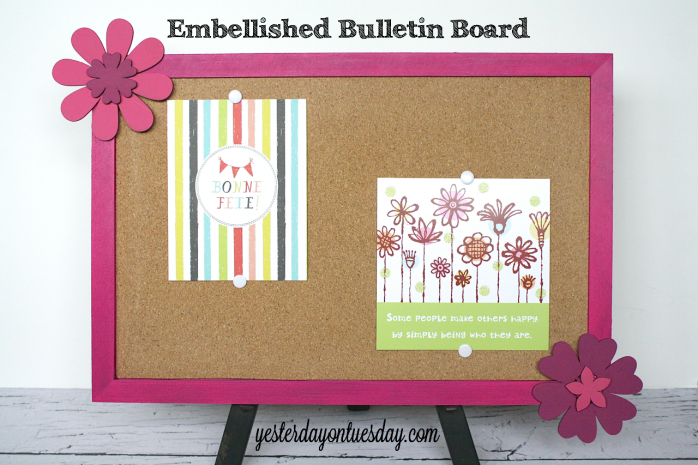
Embellished Bulletin Board
Kids will love pinning up their important stuff in style! You can upgrade a plain bulletin board in a few simple steps.
Supplies: Plain Bulletin Board, fuchsia spray paint, chipboard flowers, Delta Ceramcoat Paint in Fuchsia and Magenta, making tape and hot glue. All craft materials from Ben Franklin Crafts and Frames in Redmond.
Directions
1. Remove the cork insert from the frame.
2. Spray paint the frame fuchsia.
3. Paint the chipboard flowers fuchsia and magenta.
4. Using hot glue, insert cork board in fame.
5. Add flowers to frame using hot glue.
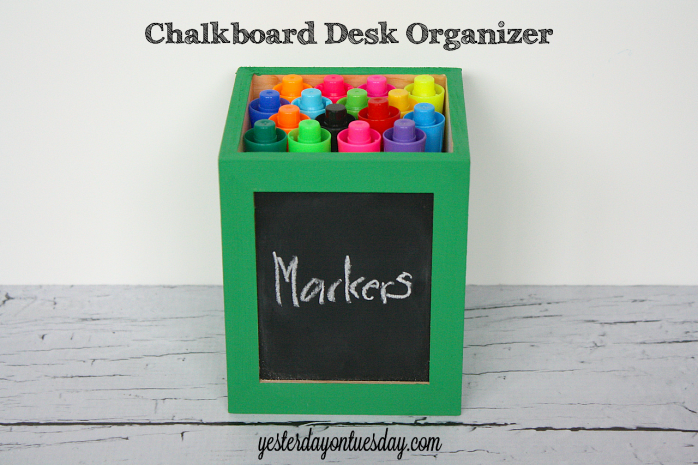
Chalkboard Desk Organizer
Toss those unusable pens and pencils and help kids get their desk area tidy with this Chalkboard Desk Organizer. Kids can customize it with their favorite color.
Supplies: Wooden desk organizer, acrylic paint (we used Delta Cermacoat in Springs Green), masking tap, a paintbrush and chalk. All craft materials from Ben Franklin Crafts and Frames in Redmond.
Directions
1. Cover the “chalkboard” area with masking tape.
2. Paint the wooden area.
3. Remove tape and fill with pens/pencils/paintbrushes.

These are some great ideas, and I love the color of the jadeite jars. Perfect for Spring!
Aimee, The Crazy Craft Lady recently posted…Snowmen Fall From Heaven Unassembled
Finally caught the early news yesterday and watched, you’re so cute! :) I loved the zinc looking letter bookends, they were my fave! The jars also looked fabulous with the copper tops. Have a great day! Sharon
Sharon B. recently posted…18 Adorable Mason Jar Ideas for Drinking {Hometalk Curated Board}