7 FUN Summer Crafts for Kids
Catch these idea live on KOMO TV’s 4pm news on Monday July 11th
7 Fun Summer Crafts for Kids
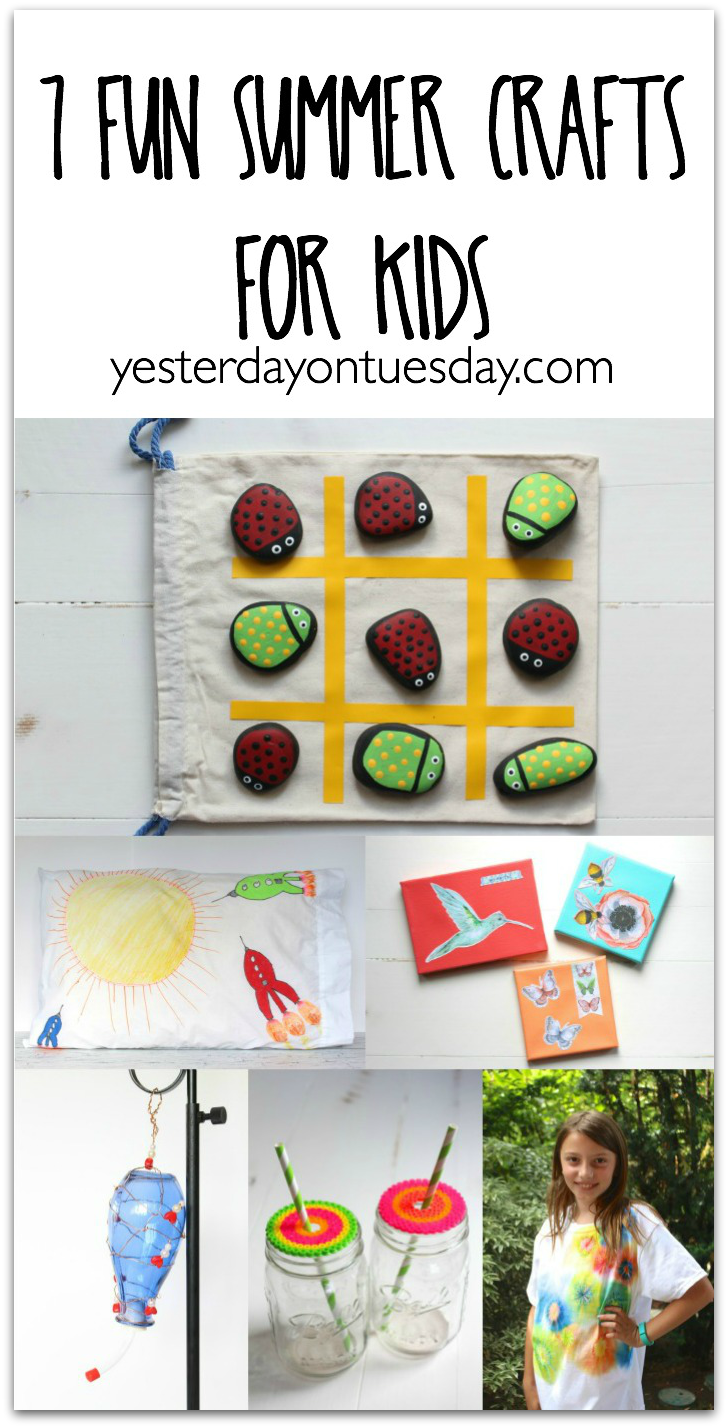
It’s summertime, and if your weather is less than sunny (Hello, Seattle!) you may want to have some fun craft ideas for the kids to make! Here are seven great projects. All the materials are from Ben Franklin Crafts and Frames in Redmond. PSST: Click the ad for Ben Franklin that’s on the sidebar for a special surprise!
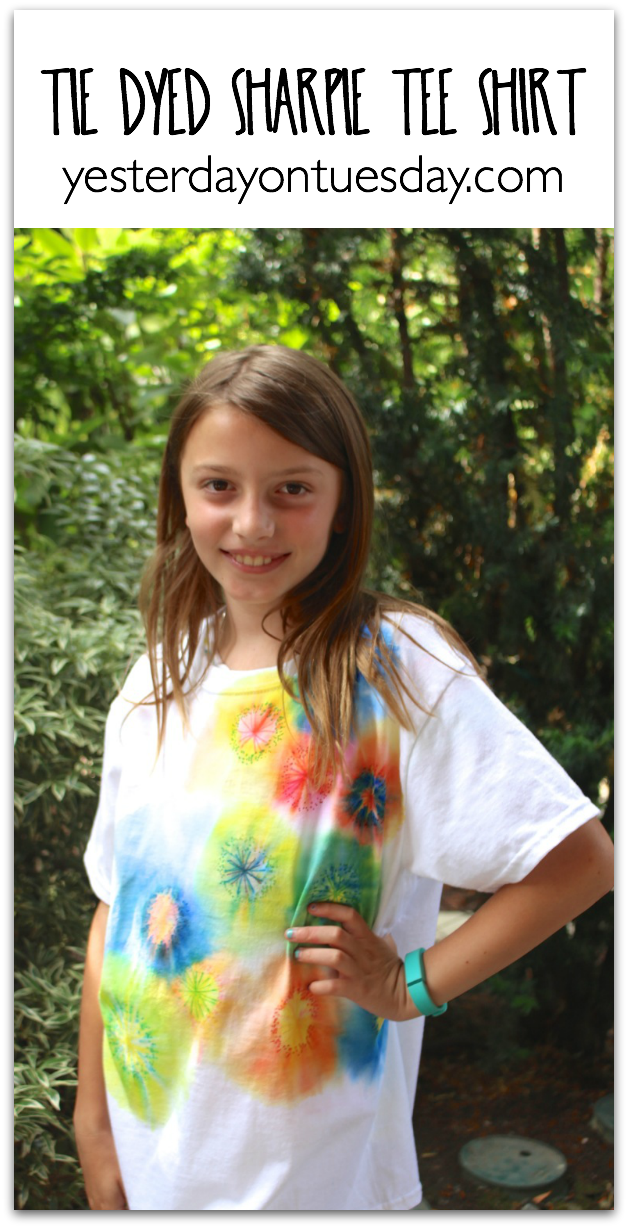
Tie Dyed Sharpie Tee Shirt
Materials: Colored Sharpie Pens (permanent ink pens), rubbing alcohol, white tee shirt, plastic cups, rubber bands, small spray bottle.
Directions
1.Stretch a section of the shirt over the plastic cup and secure it with a rubber band.
2. Dot a Sharpie to form a circle in the center of the area formed by the cup. You are aiming for a dotted ring about 1″ in diameter. You can use more than one color.
3. Spritz rubbing alcohol on the center of the circle. After a few spritzes, you will see the alcohol spread outward from the center of the ring, taking the Sharpie ink with it.
4. Continue adding spritzes of alcohol until you are satisfied with the size of the pattern.
5. Allow a few minutes for the alcohol to evaporate before moving on to a clean section of the shirt.
6. After the shirt if completely dry set the colors by tumbling the shirt in a hot clothes dryer.
How it Works: The ink in a Sharpie pen dissolves in alcohol but not in water. As the shirt absorbs the alcohol, the alcohol picks up the ink. New colors are created when different colors of ink mix together. Sharpie ink doesn’t dissolve in water, so the shirt can be washed.
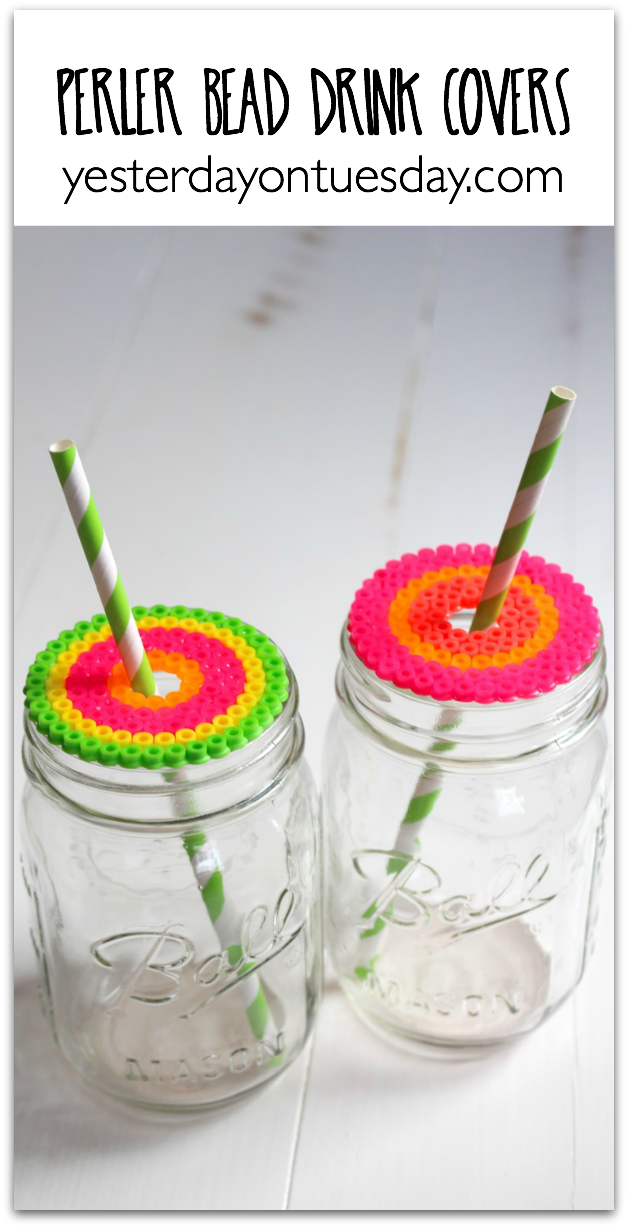
Perler Bead Drink Covers
Materials: Perler beads, circle pegboard, ironing paper and iron.
Directions
1. Find the center of the pegboard circle and the five pegs immediately around it. Don’t add beads to this area.
2. Create a design on the pegboard using coloring beads, avoiding the outermost circle and the center.
3. Place a piece of iron paper on top of the beads and iron in slow circles for 5-10 seconds.
4. Let the beads cool completely before removing the paper.
5. Use the drink covers on top of drinks to add color and keep the bugs at bay!
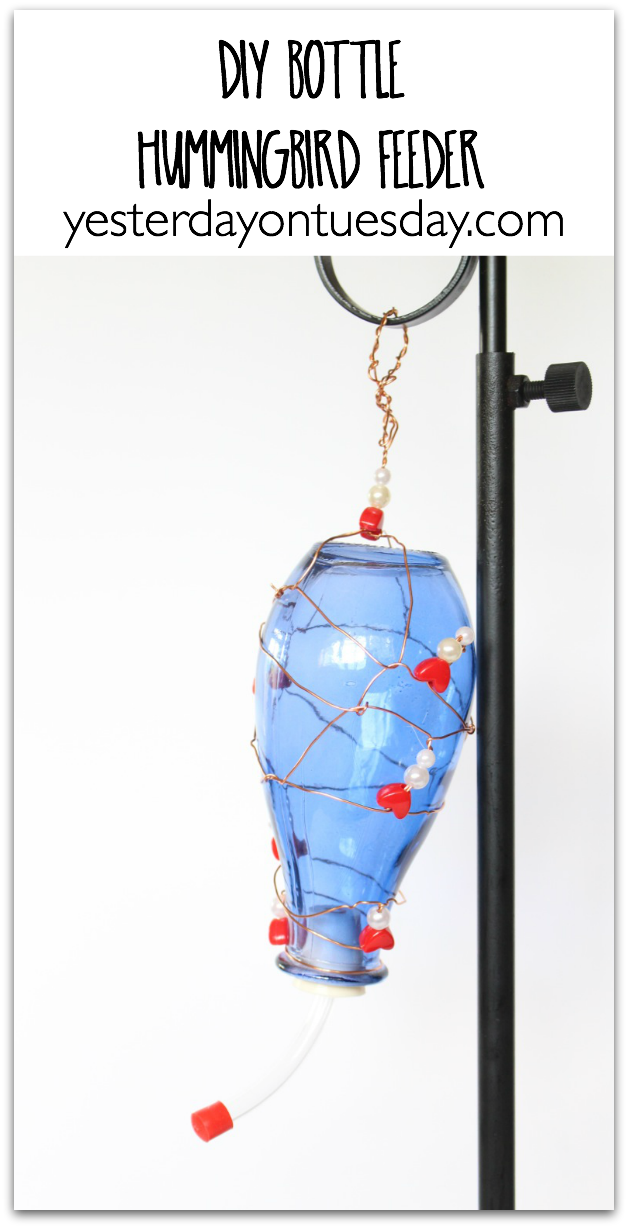
DIY Bottle Hummingbird Feeder
Materials: glass bottle, hummingbird feeder tube, beads, wire, wire cutters.
Note: Hummingbirds are attracted to the color red (some of their favorite flowers are red). Add some red to your feeder to help get their attention.
Directions
1. Wrap the neck of the bird feeder with wire several times, then continue wrapping wire around the bottle, stringing beads as you go.
2. Twist the end of the wire at the bottom of the feeder onto itself to make a knot.
3. Make a loop to hang the feeder by attaching a short piece of wire on either side of the feeder (at the bottom of the bottle).
4. Fill the feeder with homemade hummingbird nectar and push the feeder tube firmly in the bottle.
5. Hand the feeder at least 4 feet off the ground and push away branches to make a safe place for the hummingbirds to feed.
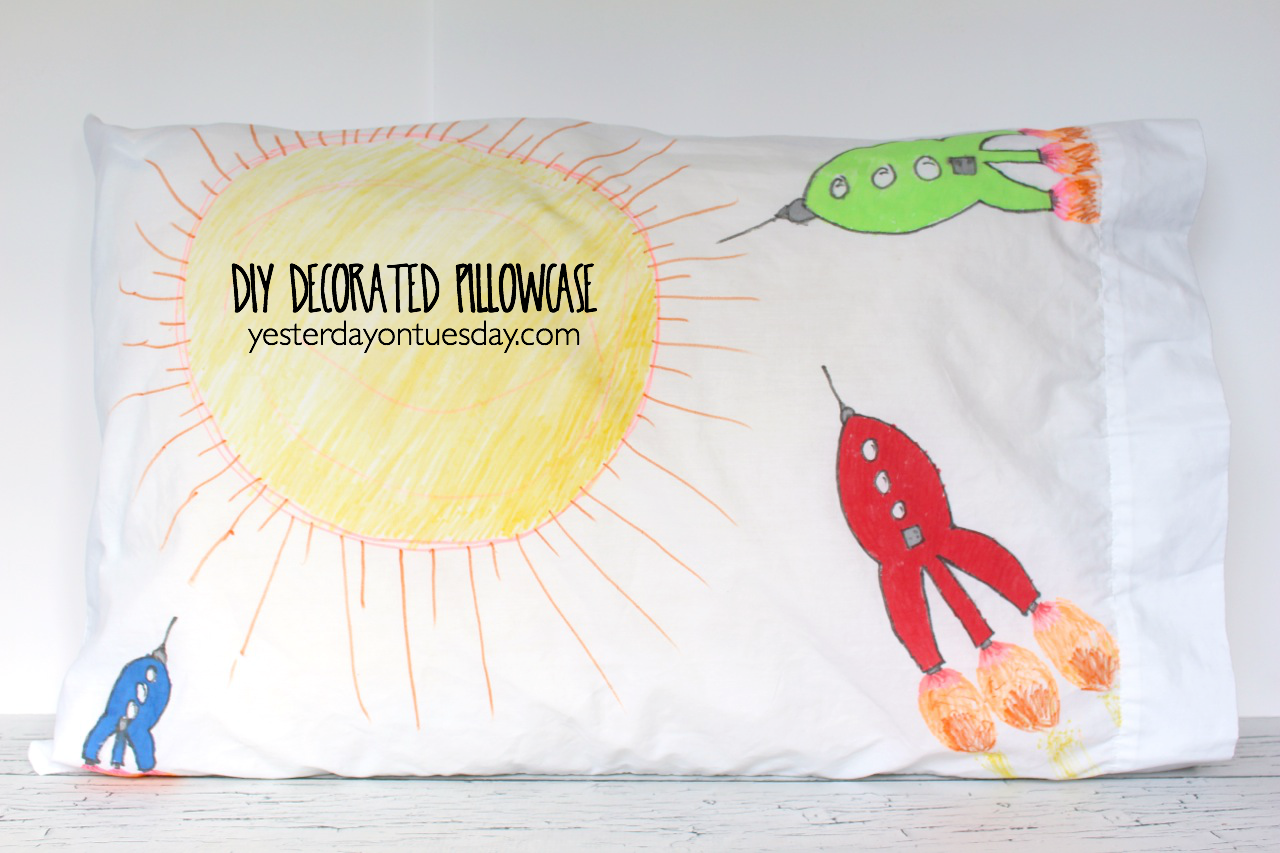
Decorated Pillowcase
Materials: white pillowcases, fabric markers (like Fabri-Mark Markers by Dri Mark), cardboard for inside of pillow case
Directions
1. Wash and dry pillowcase.
2. Place a piece of cardboard inside pillowcase.
3. Draw a big picture or design on the pillowcase.
4. Wash and dry as usual.
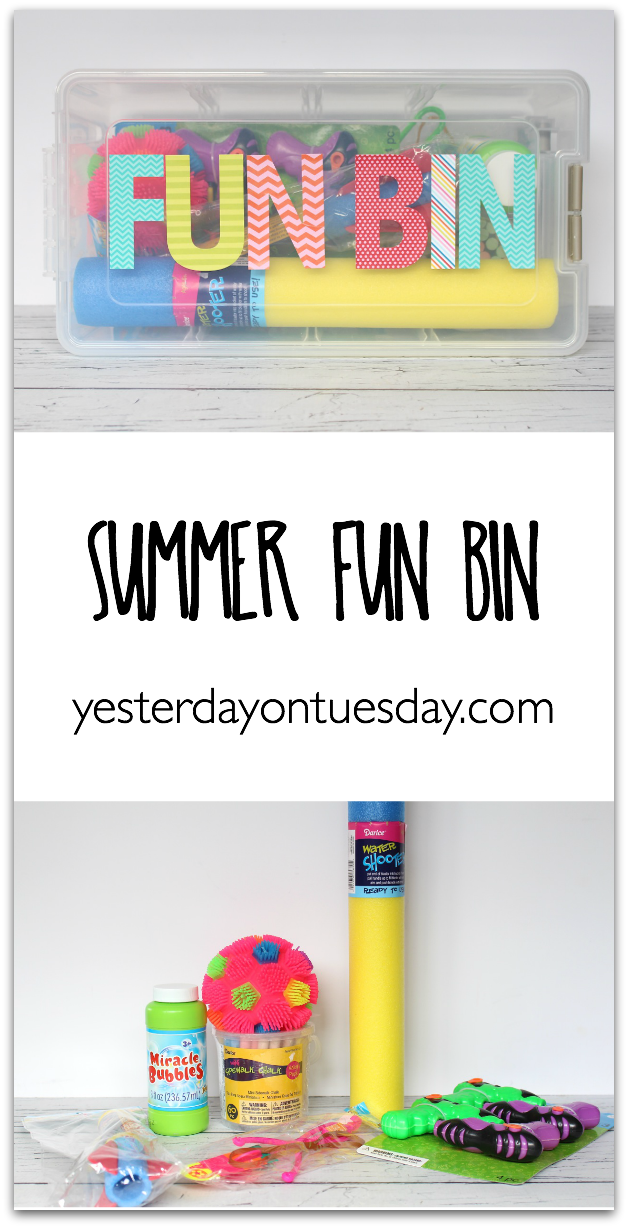
Summer Fun Bin
Supplies: plastic bin, large letter stickers, and fun summer activities like a water shooter, sidewalk chalk, foam missile, flashing sports ball, bubbles, squirt guns and plastic helicopters.
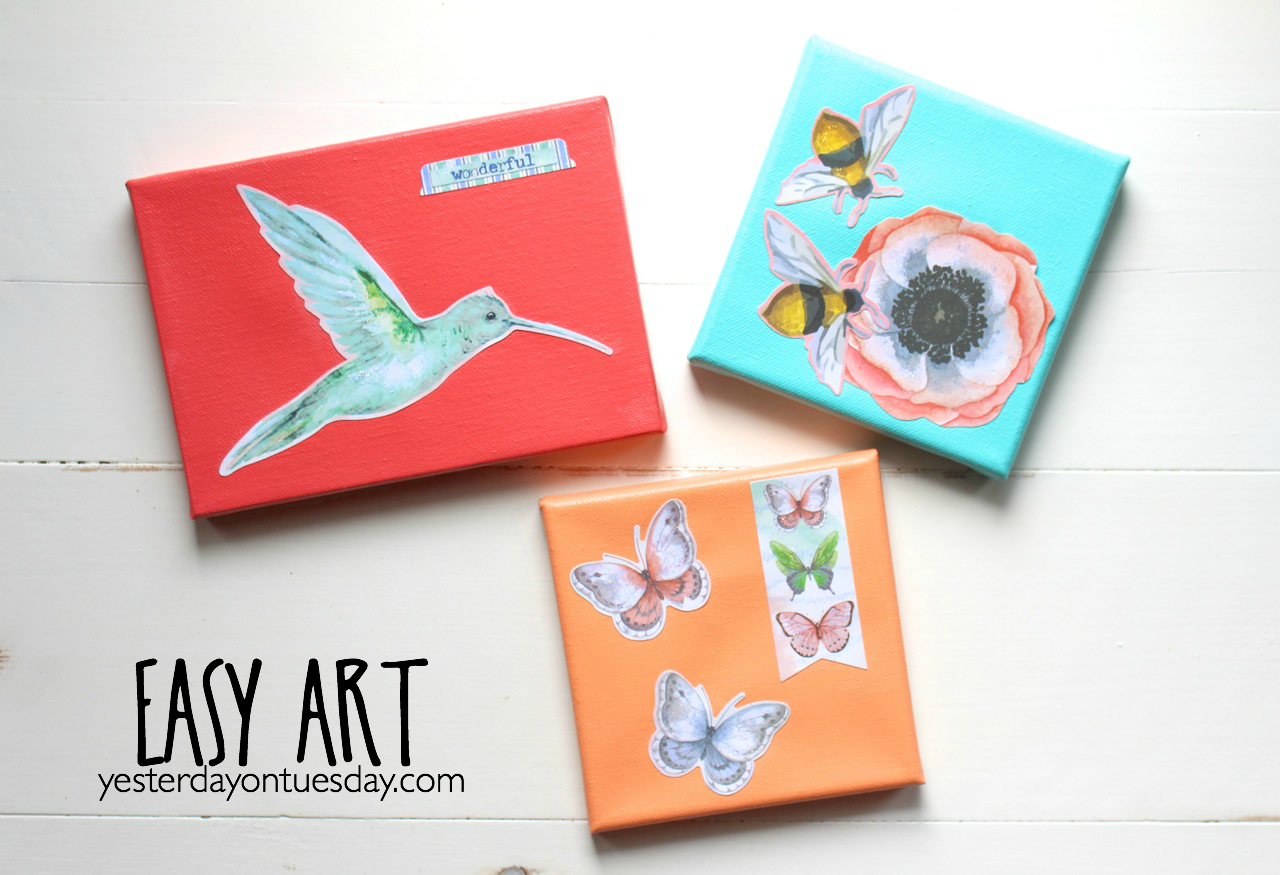
Easy Art
Materials: small canvases, brightly colored acrylic paint, cut out shapes or a piece of scrapbook paper to cut shapes out of, Royal Coat Decopage and Stickles.
1. Paint the canvas.
2. Cut out shapes. Use Royal Coat to glue to canvas.
3. Add Stickles to give the image a little sparkle.
3. Add another layer of Royal Coat on top to seal the project.
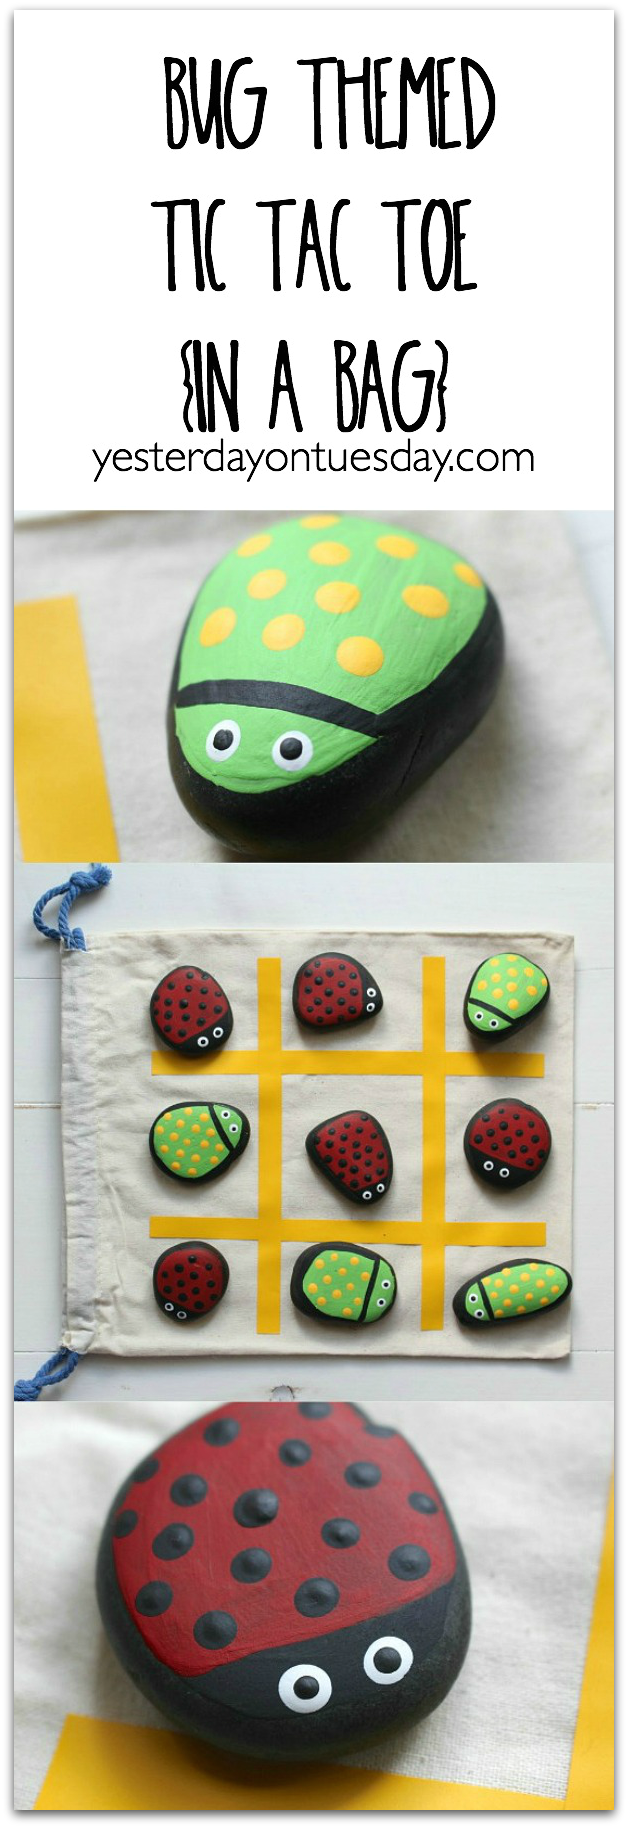
Tic Tac Toe in a Bag
Materials: small canvas bag, ten rocks with a flat side, black paint, red paint, green paint, yellow paint and white paint, a black Sharpie or vinyl (we used yellow).
1. Make a tic-tac-toe grid on the canvas with a black Sharpie or with strips of vinyl.
2. Paint Rocks
For Ladybug Rocks
Paint five rocks black. Using the photo as a guide, paint part of the rocks red. Use the handle of a paintbrush to make black dots. Use another handle to make white dots for the eyes and another smaller paintbrush to make black dots for the pupils.
For the Green Bug Rocks
Paint five rocks green (2 coats). Using photo as a guide, outline the bug with black. Use the handle of a paintbrush to make yellow dots. Use another handle to make white dots for the eyes and another smaller paintbrush to make black dots for the pupils.
3. Store the rocks inside the bag and then use the grid on the bag to play tic tac toe.
More Awesome Crafts for Kids
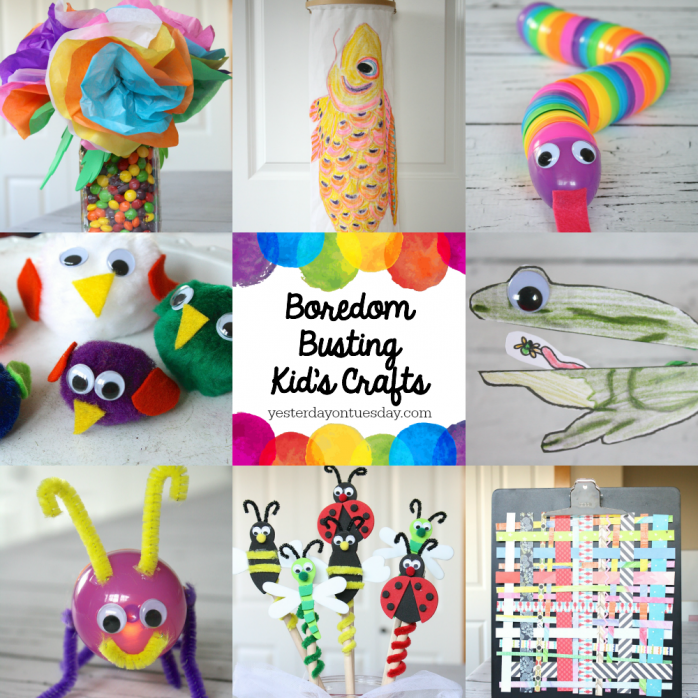
Here are some more Boredom Busting Kid’s Crafts from Ben Franklin Crafts and Frames!