DIY Holiday Gifts They’ll Love
Catch these ideas on KOMO’s 4pm News, Tuesday 12/6
DIY Holiday Gifts They’ll Love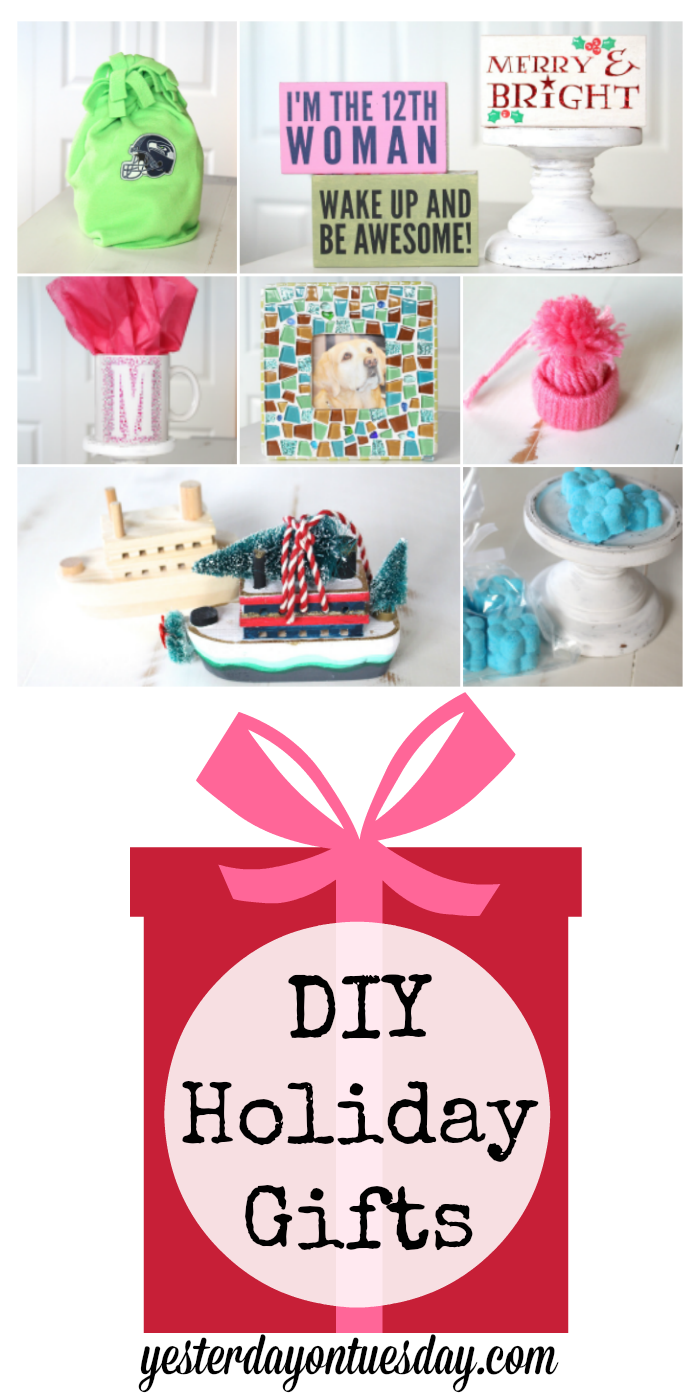
It’s the most wonderful time of the year… to make DIY Holiday Gifts! I’m about talking cool presents people will love to receive. Many of these ideas are super easy– all are colorful and fun. You can find all these craft materials at Ben Franklin Crafts and Frames in Redmond.

Christmas Trees on a Ferry Ornament
Materials
Wood Ferry Ornament, One large and one small bottle crush tree, One mini wreath , Acrylic paint in white, black, midnight blue, light blue, green and gray, Mod Podge, Gold Glitter, Hot Glue, Baker’s Twine
Instructions
1. Using the photo as a guide, paint the ferry white, except a strip at the base.
2. Paint the strip at the base gray.
3. Paint the smoke stapes and circle on boat’s deck black.
4. Paint the two “window areas” navy blue.
5. Paint the trim red.
6. For the base of the boat, make wave shapes with the light blue and green paint (on top of white layer).
7. Add a thin coat of Mod Podge and gold glitter to the boat’s trim.
8. Glue the wreath and smaller tree to the ferry.
9. Using baker’s twine, add larger tree to top of ferry.

Yarn Hat Ornament
Materials
3/4″ wide x 5 1/4″ long strip of card stock strands, 12″ long each, Tape, Scissors
Instructions
1. Make the card strip into a circle with about a 1/4″ overlap and tape in place.
2. Set aside one strand of the cut yarn. Fold a piece of the yarn in half and tie over the strip with a lark’s had knot.
3. Continue tying all of the yarn this year.
4. Holding on to the circle with the yarn hanging down, take all of the ends and push them through the circle and out the other side. Pull on the yarn slightly so you can’t see the know edge.
5. Gather the yarn together and tie off with the strand that you set aside.
6. Tie another knot at the end of the strand to create a hanger.
7. Trim the yarn ends into a pom pom for the mini hat.
8. Hang your darling Yarn Hat Ornament on the tree!

Monogram Mug
Materials: Large white Ceramic Mug, large letter sticker, Silver Oil Based Sharpie Marker, Pink “Painted by Me” pen, oven. Also handy– rubbing alcohol and Q-Tips for mistakes.
1. Clean and dry mug.
2. Apply large sticker and use credit card/plastic card to insure the there are no bubbles.
3. Dot with silver pen all around letter.
4. Dot with pink pen all around letter.
5. Remove stickers and clean up any seepage with rubbing alcohol.
6. Bake mug in oven for forty minutes at 375 degrees.

No Sew Felt Hat
Materials: 3/8 a yard of fleece(60 inch wide fleece will make 2 child sizedhats), 3/4″ masking tape, sharp scissors, optional: Seahawks fabric cutout for appliqué and Heat-n-Bond iron on fusible
Note: The dimensions will be according to the size of the head of the child. The vertical measurement of the rectangle is standard at 13 inches. The horizontal measurement will be the length of the head’s circumference, plus 2 inches for the fringe.
Instructions
1. Cut a strip from one of the short ends of the fabric about an inch wide. Put aside for tie on top of hat.
2. Cut out a rectangle of fleece.
3. If you wan to apply appliqué: Lay out flat your cut piece of fleece and make a mark at the 12″ measurement (the middle) and 4 3/4″ up from the bottom edge. This is the mark for the bottom edge of your Seahawk appliqué. Roughly cut out the shape of the Seahawk emblem. Follow the instructions for using the Heat-n-Bond and iron the emblem on your mark.
4. Fold your fleece rectangle in half, lining up the short edges carefully.
5. Fringing: Put a strip of masking tape 2 inches in from the edge of the short edge. This marks how long to cut the fringe. Place 3 short pieces of tape up to the 2 inch line. Keep moving the short tape pieces up as you cut.
6. Open up your fleece and fold the ends into the middle, just touching.
7. Starting from the bottom, knot the fringes together. Stop about 3 inches from the top. Cut off any fringe pieces within that 3 inches at the 2 inch mark. Take off any remaining tape.
8. Lay a piece of tape along the top of the 3 inch mark. Take off any remaining tape.
9. If you have an appliqué on your hat then turn hat inside out.
10. Gather the top of the hat together and tie with the strip you set aside earlier.
11. Roll up the brim and you’re done.

Peppermint Bath Bombs
Materials: 2 Cups of Baking Soda, 1 Cup of Citric Acid, 30 drops of Essential Oil (Abbey & Sullivan Purely Peppermint), 1 Tablespoon of Olive Oil, 15-20 drops of Soapsations Liquid Color in Blue, plastic mold(s). Also helpful– plastic gloves, a plastic spoon, a sifter and small bottle of water with spritzer.
Instructions
1. In a large bowl, sift together the baking soda and citric acid. Mix together well.
2. Add the essential oil, olive oil and food coloring (it may fizz).
3. Combine mixture and spritz with water until it clumps.
4. Add mixture to mold, packing it in.
5. Let it sit for a few hours, then pop shapes out of mold.
6. Package in clear plastic bags and tie with ribbon.

DIY Bath Crystals
Materials: 1 cup Soapsations Bath Crystals, 10-15 drops, Essential Oil (Abbey & Sullivan Purely Peppermint), small glass jar, small wooden spoon, fabric scrap, ribbon.
Instructions
1. Mix the bath crystals and the oil, and let it dry for 24 hours. Add to jar.
2. Cut a square of scrap fabric and place on top.
3. Tie a ribbon around lid and tuck spoon underneath.

Candy Sleigh
Materials: Two Candy Canes, Peppermint Bark Candy Bar, Small Plastic Box filled with Chocolate Clusters, ribbon, craft glue.
Instructions
1. Tie ribbon around box.
2. Glue candy canes to candy bar.
3. Glue box to candy bar.

Mosaic Frame
Materials: Wood Frame, Mosaic Pre Cut Tile, tile grout, modeling glue
Instructions
1. Glue mosaic tiles to wood frame.
2. Add tile grout to area, then wipe away any grout on tiles.
3. Let it dry for 24 hours.

Mini Signs
Materials: Small Wood Block, Vinyl Words from Decorating Your Life, Acrylic Paint, scrapbook paper, Mod Podge.
Instructions
1. Paint box.
2. Cut scrapbook paper to fit on box and adhere with Mod Podge.
3. Add vinyl.

I like giving homemade gifts, as I find them to be more personal. You have provided some great ideas, thanks for sharing!