Command Center Organization Ideas
Catch these ideas live on KOMO Channel 4, Monday September 26th at 4 pm
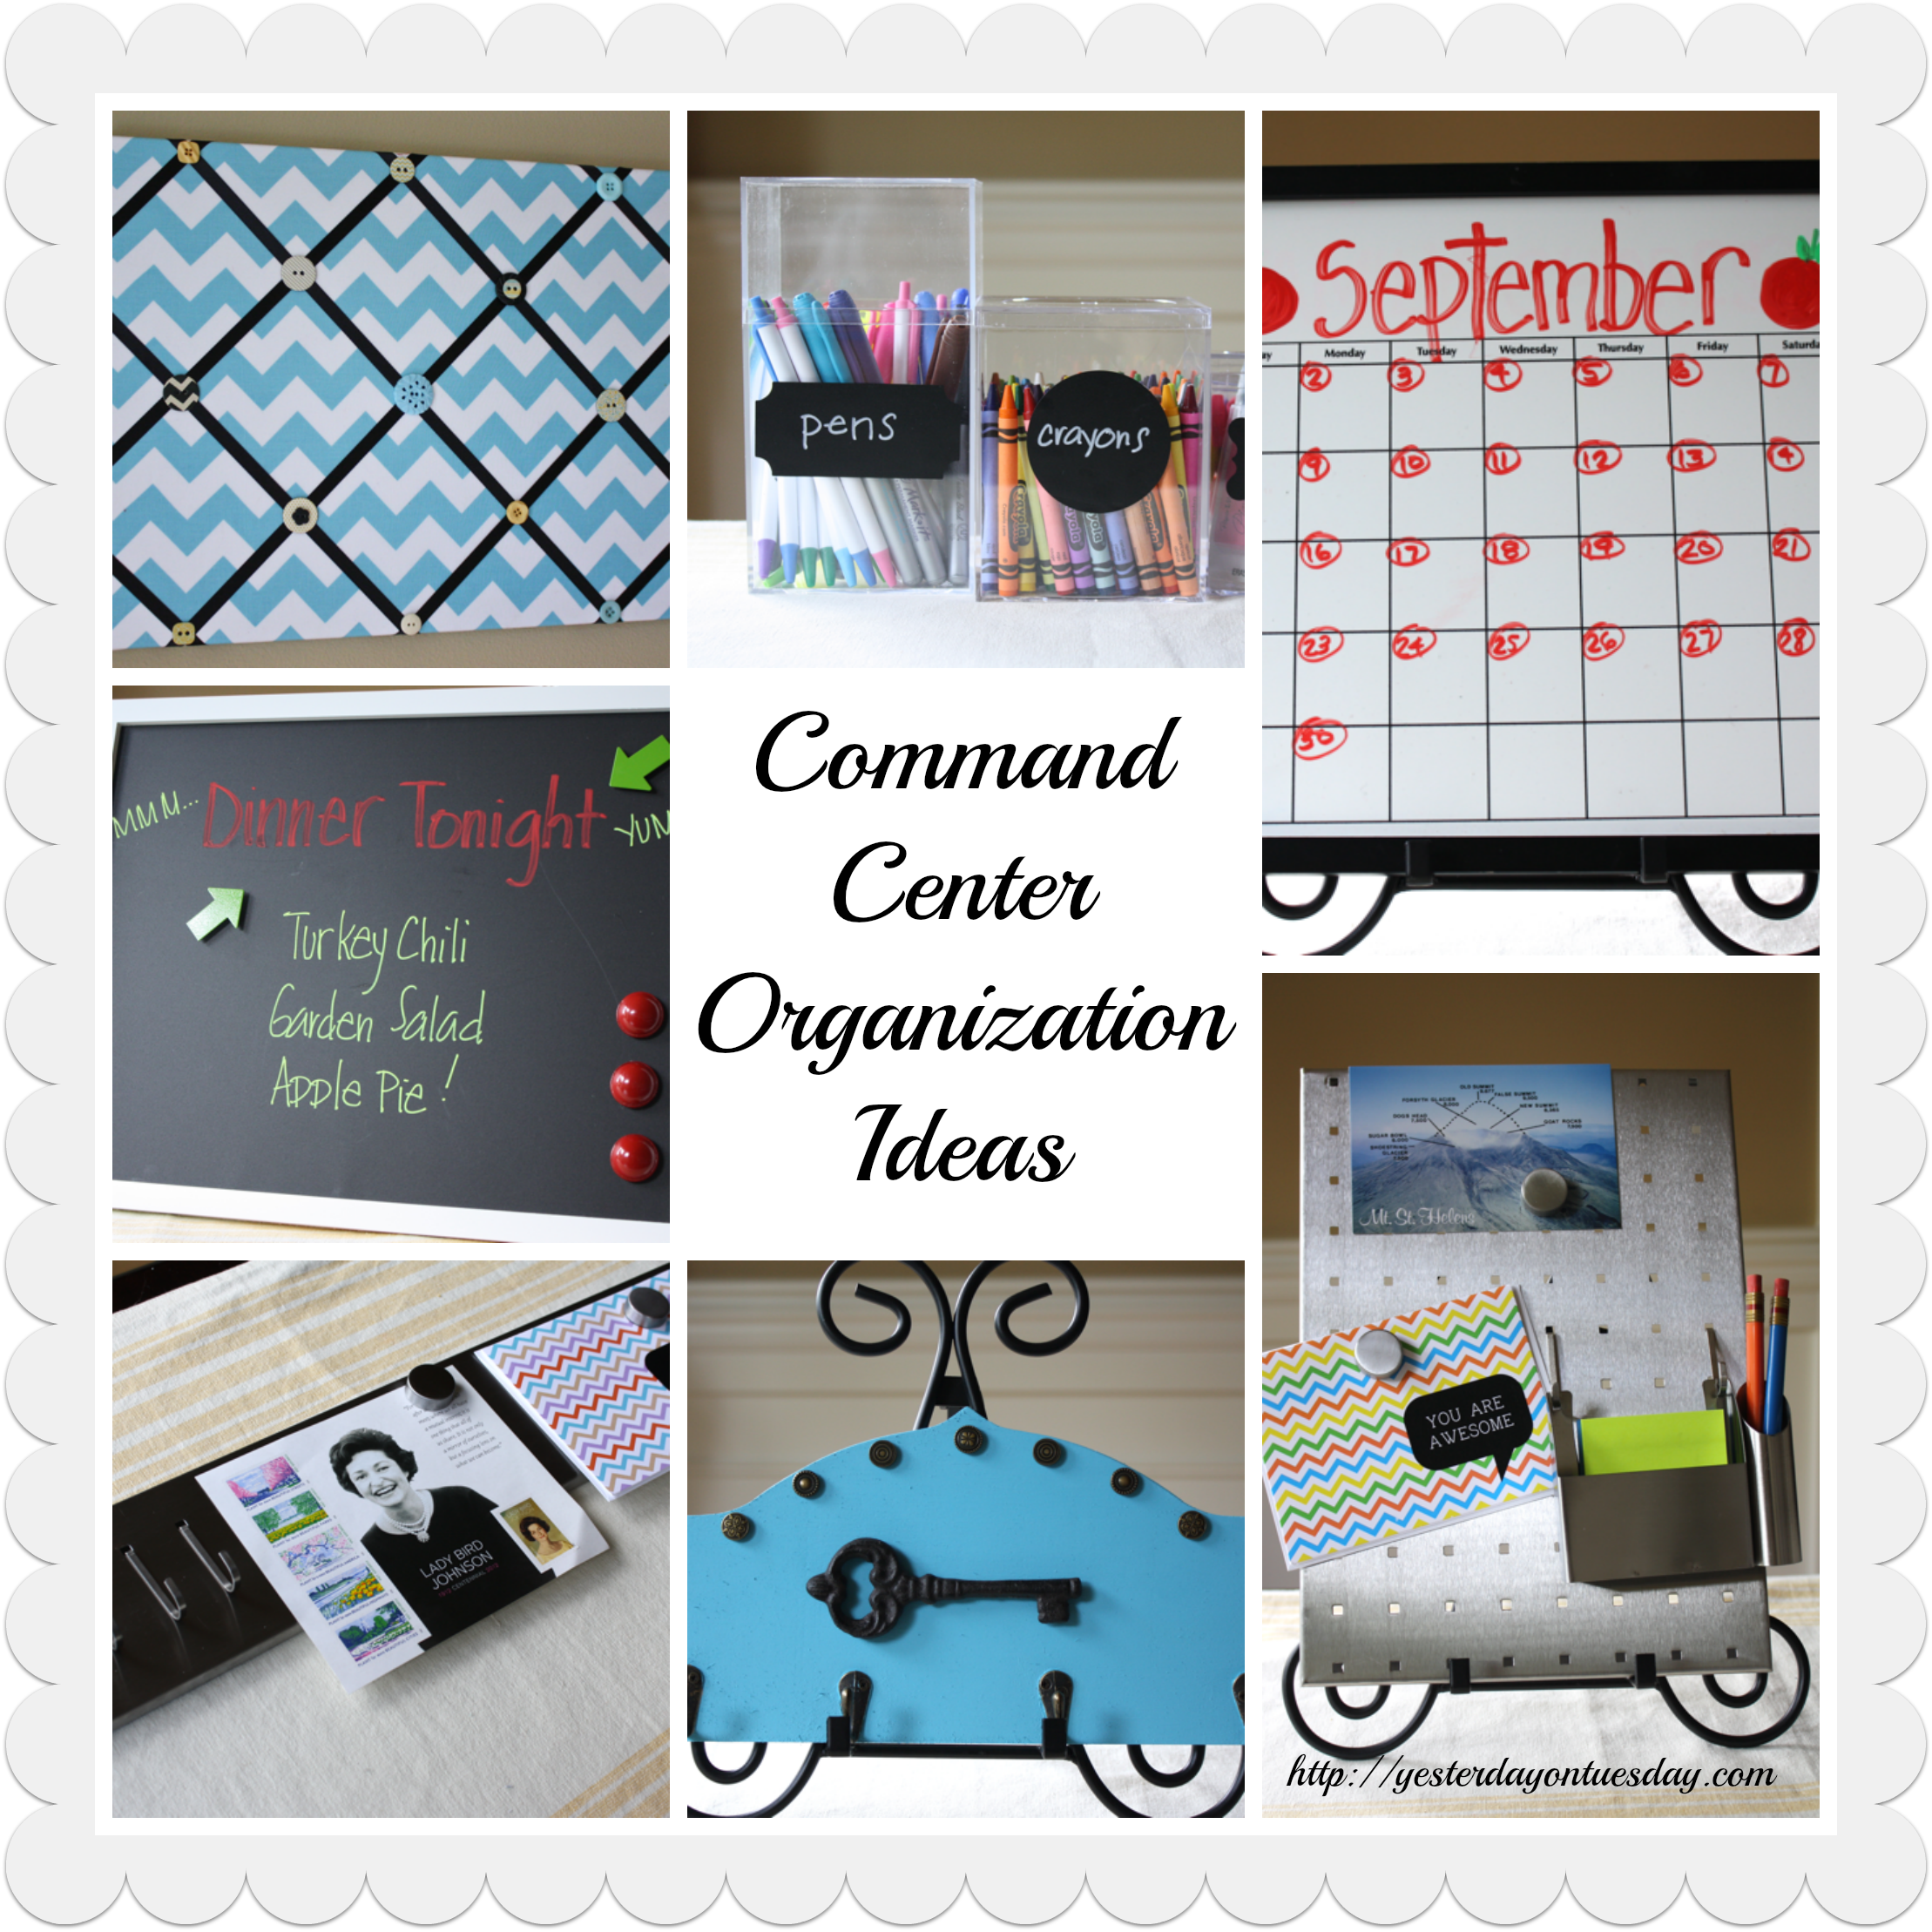
Command Center Organization Ideas
For many families, the Command Center is the “brain” of the home. It’s the place where school and sports schedules are posted, the calendar and keys are kept, and tonight’s dinner menu is available. Here are some ideas for streamlining your Command Center.

Command Center Ribbon Memo Board: A pretty way to keep things organized and available.
Materials: 16″ x 20″ canvas board, 2/3 yard fabric, 6 yards of 3/8″ wide ribbon, decorative brads or buttons, staple gun, Ultimate Tacky Glue, batting (for a fluffy look), marble discs (all supplies available at Ben Franklin Crafts and Frames Redmond).
Instructions
1. Fabric should have at least a 2″ clearance to wrap the canvas board
2. Lay on top of canvas board face down on the wrong side of fabric
3. Bring fabric up over the sides and tuck underneath or use staple gun to secure. Fold the corners as though wrapping a box.
4. If using batting sheet for a puffy look apply first then lay fabric on top
Adding ribbon: Ribbon is applied in a basket weave pattern. Start at one corner and work across to the opposite corner. Space the ribbon equally apart (appoximately 5-1/2″ for 16″ x 20″ board). Spacing will vary depending in size of board. Cut the ribbon off after attaching it to the board.
Helpful Hint: Use thumbtacks to temporarily secure ribbon and adjust for appropriate spacing before stapling. Secure to backside of the canvas board using staple gun. Repeat the same procedure with the opposite corner.
Finish by punching a little hole with a sharp awl in canvas an insert brads at the intersections of the ribbon for the criss cross board or different areas on the ribbon on the memo board. Dab a little glue on top of brad to add embellishment.

Command Center Chalkboard Labels and Plastic Containers: Keep the essential stuff at your fingertips with these labels and plastic containers.
Materials: Chalkboard Labels and Bistro Marker (all supplies available at Ben Franklin Crafts and Frames Redmond).
Instructions: Simply use a Bistro Marker to write on the chalkboard labels and erase if you need to change them. Affix to plastic containers so it’s easy to find what you need on your desk.

Command Center Erasable Calender: Keep everyone’s schedule visible with an eraseable calendar. This would also make a great chore chart!
Materials: Picture frame, Paper Accents eraseable calendar and Bistro Markers (all supplies available at Ben Franklin Crafts and Frames Redmond).
Instructions: Use a Bistro Marker to create a current calendar, erase when it’s time for a new month to start.

Command Center Magnetic Memo Board: Keep essential items handy– out of drawers and off your kitchen counter.

Command Center Key Holder: Never lose your keys again (in the house at least)!
Materials: Key holder (unfinished wood), giant key, Americana Paint in Indian Turquoise, E6000 Industrial Strength Adhesive, Metal Stickers, paintbrush and masking tape (all supplies available at Ben Franklin Crafts and Frames Redmond).
Instructions: Tape off the hooks on the key holder with masking tape. Paint wooden part with the turquoise paint (may need two coats). After paint is dry, use the E-6000 glue to adhere the giant key. Add metal stickers. Don’t forget to hang up your keys!

Command Center Magnetic Board with Hooks: Keep your stuff within reach with this space saver you can mount on the wall. Add a few small buckets to corral odds and ends.

Command Center Magnetic Board: Let everyone know what’s for dinner… or what chores they need to do with this Magnetic Board.
Materials: 11 x 14 Picture Frame, 11 x 14 sheet of metal, Darice Sticky-Back Chalkboard Vinyl, Bistro Markers, scissors and credit card (to burnish).
Instructions: Measure and cut a piece of the sticky-back chalkboard vinyl to cover metal (it’s super easy since there’s how a grid on the back). Line up the vinyl and the metal sheet and peel the backing off, burnishing with the credit card as you go (preventing air bubbles). Pop covered metal in frame. Write on surface with Bistro Markers.
Here are a few places that I like to link my projects up to.

I’ve been wanting/needing to revamp my command center … these are great ideas!
Randi – Dukes and Duchesses recently posted…Project Inspire{d} Link Party :: Wall Art Features
Thank you Randi… I want to re-org my area too!
Great ideas!!! I love the key holder. I haven’t seen one like that. Super cute!! Thanks so much :)
Aww thanks Crystal… I love the key holder too and it came “pre-hooked”… the hooks were already on there!
I love these ideas! We are stll trying to make our mudroom/command center work for us and this givs me some new ideas to try. Thanks again!
Ila recently posted…Football Subway Art Freebie
You are a wealth of ideas, my friend! I just wish I could get your local TV station where I am so I could see you in action! :)
Laura / The Shed by Pet Scribbles recently posted…In love with aqua blue Ball jars!
Love command centers! I especially love the magnetic board. Great collection!
Raquel @ Organized Island recently posted…Kit Kat Cupcakes