7 Patriotic Projects for the 4th of July
Catch these ideas LIVE on KOMO-TV Monday June 29th at 4pm
7 Patriotic Projects for the 4th of July
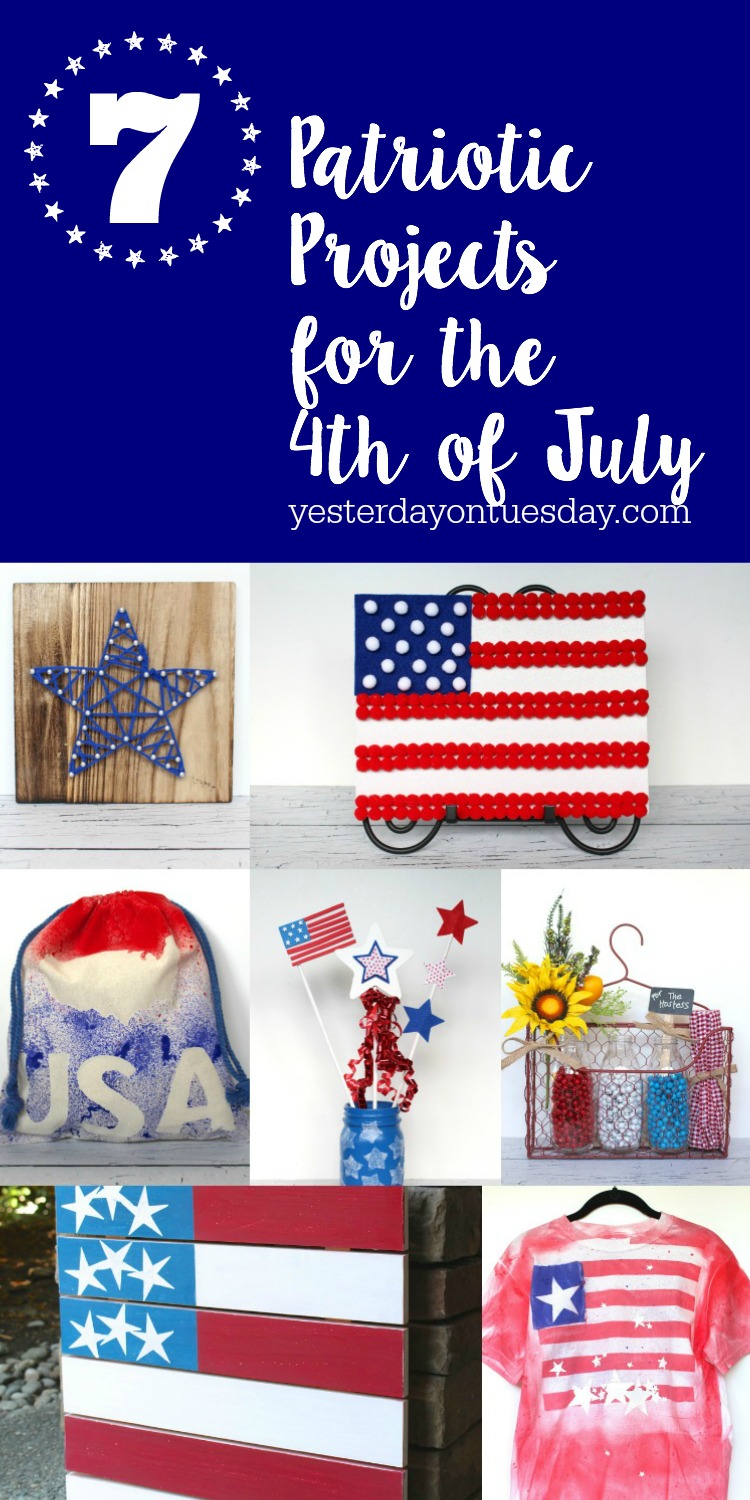
Red, white and blue are all in the forecast as we get ready to celebrate 4th of July. Here are some easy projects for kids as well as some cool ideas for party decor.
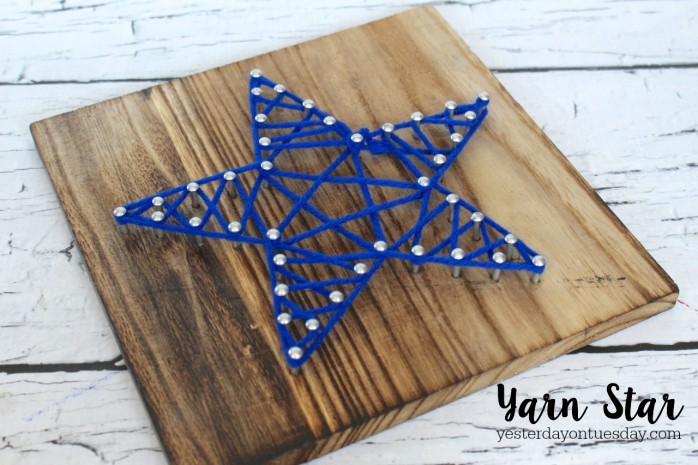
Yarn Star
If you’ve ever wanted to try the string art trend but felt overwhelmed by how to start, this is the project for you! The nails have been pre-placed in a perfect star pattern, just add yarn.
Supplies: String Art – Star Kit by Cosmo Cricket and string of your choice available at Ben Franklin Crafts and Frames in Redmond.
Directions: Following the directions on the back of the kit, add yarn to create a star.
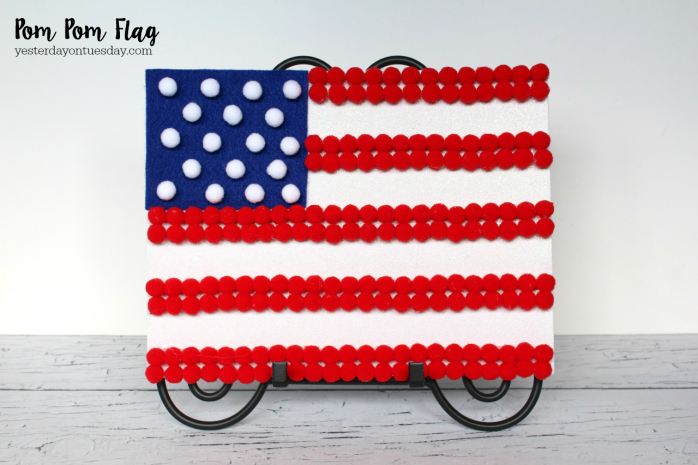
Pom Pom Flag
Kids will love making this 3-D flag project with mini pom poms!
Supplies: White Glitter Foam, 1 piece of blue felt (cut to 4 1/2″ L to 4″ W), 2 packages of small red pom poms, 1 package of small white pom poms, craft glue and a ruler. All supplies available at Ben Franklin Crafts and Frames in Redmond.
Directions
1. Using craft glue, adhere the blue felt rectangle to the upper left hand corner of the foam sheet.
2. Add two rows of pom poms at the top of the foam sheet.
3. Place the ruler underneath the bottom row and add two more rows (the ruler gives you a nice straight line).
4. Continue until you have five double rows.
5. Add white pom poms on blue rectangle in place of “stars.”
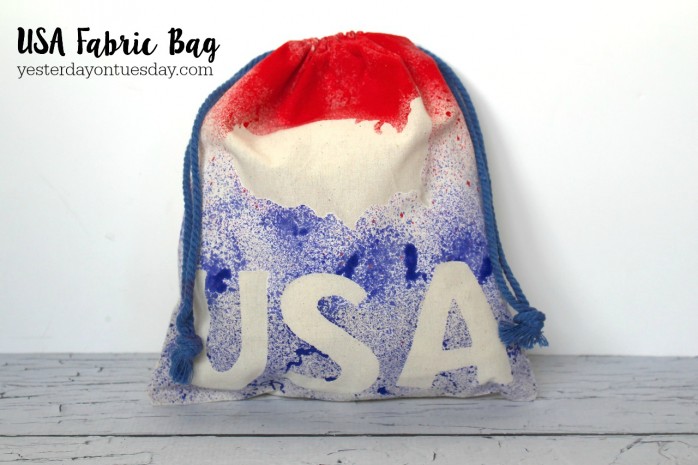
USA Fabric Flag
Everyone loves a parade, especially kids! Many of the 4th of July parades in our area involve people on the floats tossing candy to kids. Kids can get set for this fun event by decorating their own fabric bag for the 4th!
Supplies: 10 1/2″ L by 9″ W canvas bag, Tulip Fabric spray Paint in Sapphire Blue, Christmas Red and Snow White. A sheet of vinyl (using the Die Cut Center at Ben Franklin Crafts and Frames in Redmond) cut out the United States as well as 3″ USA letters. You could also use large stickers if you can’t get to the die cut machine. All supplies available at Ben Franklin Crafts and Frames in Redmond.
Directions
1. 1. Place the graphics and letters on the bag.
2. Use a ruler or credit card to press down around the edges of the vinyl to ensure you have good adhesion.
3. Place a piece of cardboard inside the bag so the paint won’t seep through.
4. Spritz the white fabric paint in the middle of the bag and let in dry.
5. Spray the red fabric paint towards the top of the bag and let it dry.
6. Finally, add the blue paint at the bottom and let it dry.
7. After all the paint is totally dry, remove the vinyl graphics and letters.
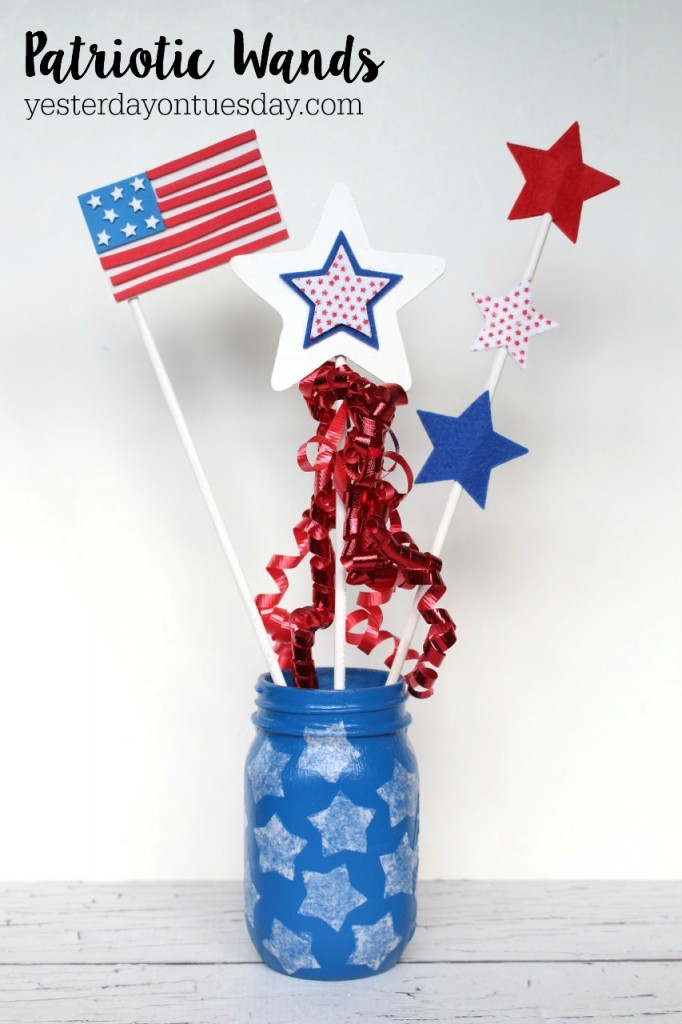
Patriotic Wands
Making wands is a great project for kids and/or a great decor idea for you! They are fun to wave at a parade and also look festive decorating your home. Here are three easy ideas.
Supplies: Wooden Dowels (these are 12″ L and 3/16″ W), flag dowel, white paint like Chalky Finish Paint in Everlasting and craft glue. For the flag wand Foamies Busy Bucket (makes 20 foam flags). For the Flag Wand, Felties Flag Stickers (52 pieces) and curling ribbon. For the 3- Star Wand, Felties Flag Stickers. All supplies available at Ben Franklin Crafts and Frames in Redmond.
Directions:
1. Paint the dowel or star dowel white.
2. For the Flag Wand, create a foam flag and use craft glue to attach it to the dowel.
3. For the Star Wand, add star stickers and curling ribbon.
4. For the 3-Star Wand, add star stickers (front and back).
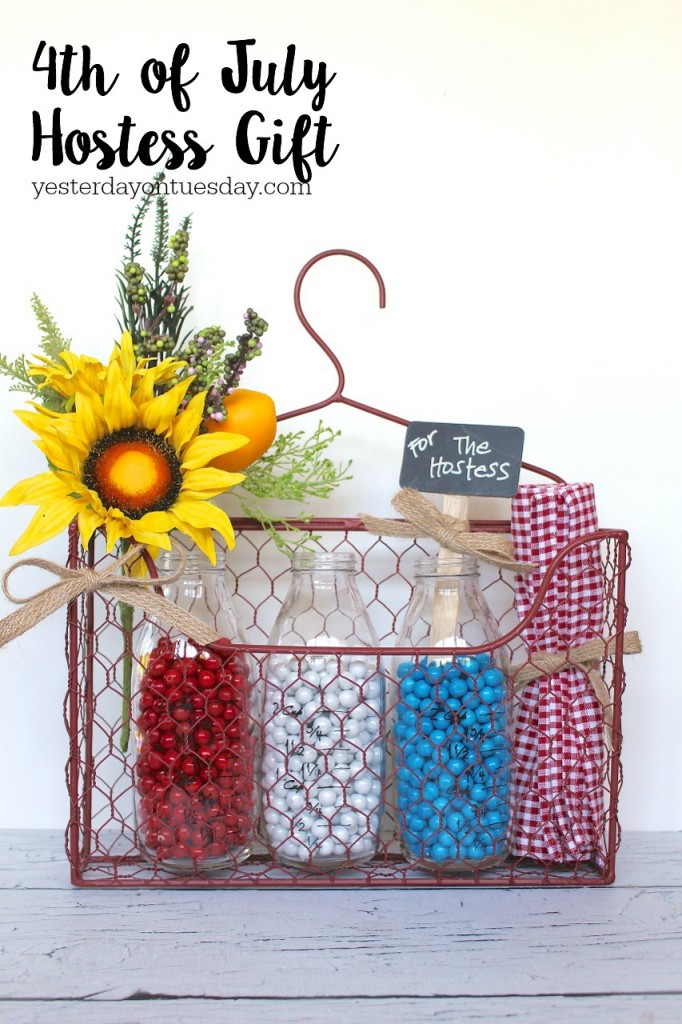
4th of July Hostess Gift
Show your 4th of July party hostess that you think she’s the mostess with this red, white and blue gift.
Supplies: Red Wire Caddy, 3 Glass Milk Bottles, Sixlets (in red, white and blue), a gingham napkin, chalkboard sign, twine or ribbon and faux sunflower. All supplies available at Ben Franklin Crafts and Frames in Redmond.
Directions: Using the photo as a guild, add flower, bottle, napkin and signs.
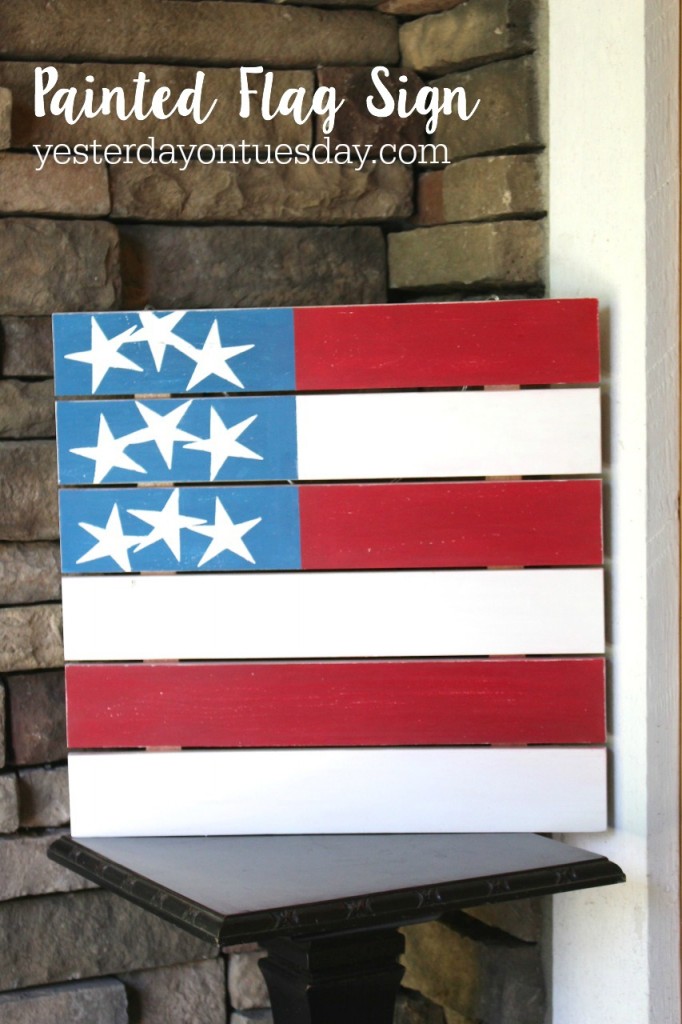
Painted Flag Sign
Make this Painted Flag Sign once and use it for years to come. It’s a wonderful way to how your patriotic pride.
Supplies: Wood Sign, Chalky Finish Paint (in colors Legacy, Everlasting and Rouge), vinyl stars or stickers, a ruler, painter’s tape and sandpaper. All supplies available at Ben Franklin Crafts and Frames in Redmond.
Directions
1. Paint the entire sign white (Everlasting).
2. Use a ruler to mark off 7 1/2″ W by 8″ L and use painter’s tape to section it off.
3. Place star vinyl or stickers inside the rectangle shape.
4. Paint two coats of blue (Legacy) inside the rectangle.
5. After that area is dry, paint every other stripe/board red (Rouge).
6. When all the paint is dry, lightly sand it to get a distressed look.
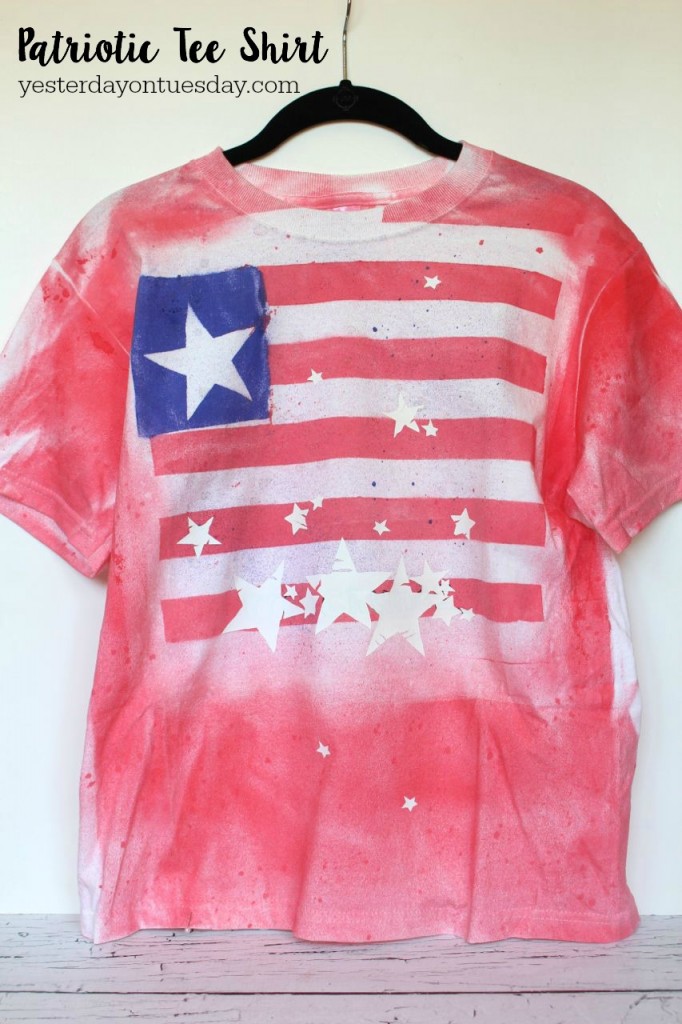
Patriotic Tee Shirt
Supplies: White Tee Shirt, Tulip Fabric spray Paint in Sapphire Blue, Christmas Red and Snow White. A sheet of vinyl cut into strips to make the stripes and rectangle. You can use the Die Cut Center at Ben Franklin Crafts in Frames to make the large and small star shapes. You’ll also need a piece of cardboard for inside the shirt, painter’s tape and iron on stars (if desired). Supplies available at Ben Franklin Crafts and Frames in Redmond.
Directions
1. Place the cardboard inside the shirt so the paint doesn’t seep through.
2. Using the photo as a guide, add six or so “stripes” this will make the white stripes.
3. Tape off a square in the upper left hand corner (inside also) so it won’t get red paint on it.
4. Spray the shirt with red paint and let it dry.
5. Remove the painter’s tape from the upper right hand corner.
6. Now make a square outside in that space and place a star in the middle.
7. Spray that square space with the blue fabric paint and let it dry.
8. If desired, add iron on stars.


These are great projects for the 4th of July! My is the fabric bag but I think my kids would vote for the magic wands.
Kelly of Simply Kelly Designs recently posted…LMDO – Laughing My Diaper Off Onesie
Hello cute lady!Thank you for hosting such a fun party.We would appreciate it if you would stop by our party that starts tonight at 7 pm. Lou Lou Girls
Lou Lou Girls recently posted…Star Wars Death Star Cake