Make it Monday: Plastic Bottle Cuffs
Hi… Wanna be friends? Follow me via Google Friend Connect or Typepad (right sidebar) and leave me a comment so I can follow you back!
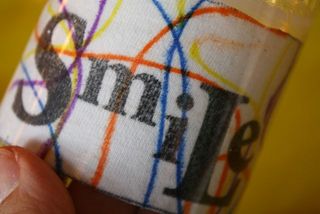
Hello Everybody! Hope you had a fantastic weekend. This is going to be a great week here at YoT. Today we're transforming plastic water bottles and old tee-shirts into cools cuffs.
Tomorrow it's Give Away Time courtesy of PurpleTrail. This is the coolest site for creating announcements, invites and party planning. They are sponsoring a very generous giveway– you'll want to check it out.
Wednesday I'm interviewing my friend and Crafty Soiree Co-Host Katie from Katie's Nesting Spot. And on Thursday… it's party time! Katie and I will throwing our first Crafty Soiree Party. We can't wait to see what you're been up to– art, crafts, decor, organizational projects, recipes, sewing… anything creative.
Plastic Bottle Cuff Project
Inspired By "Kid Made Modern" by Todd Oldham
Supplies: Plastic water bottles (I'd say the bigger the better) that have some "smooth" space, craft glue, permanent markers, old while tee shirts, sharp scissors, Staz-On permanent ink, stamps, tape, a foam paintbrush, stickles (optional). You also need cardstock, a corner rounder and a ruler to make the cuff templates. I also used kitchen scissors to cut the plastic bottles.
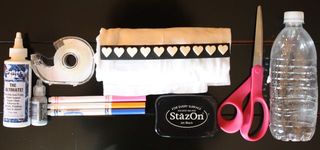
This craft was created with the help of our friend Kira. Kira is a five year old with a fierce sense of style. Check out the bling the girl's got going on her right hand. Sha-zam!
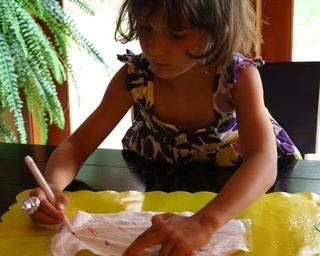
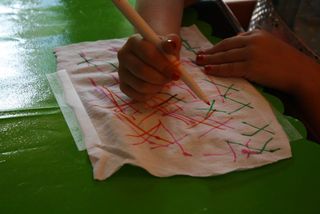
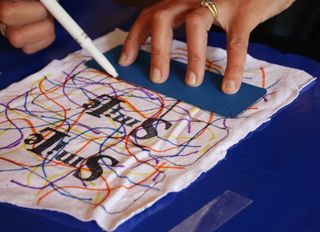
Step 2: Draw a pattern on your tee-shirt material.
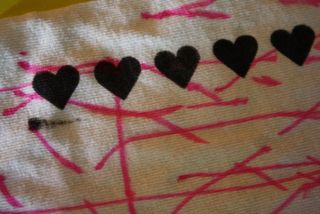
Step 3: Stamp some fun shapes/words on your design with Staz-On Ink. If you aren't familiar with Staz-On… the name says it all. It's permanent! Keep in mind that the finished product will be the length and width you choose for your cuff– so you want whatever stuff you're stamping to fit within those dimensions. These cuffs are 1 1/2' by 6" and 2" by 6".
Step 4: Make your cuff template with a ruler, cardstock and a corner rounder. Trace cuff template around your design.
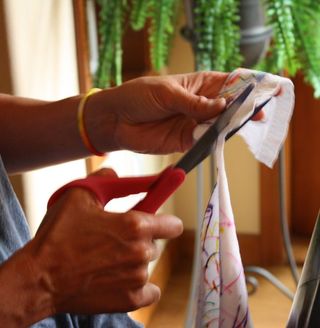
Step 5: Cut out your pattern with sharp scissors. If you're doing this project with your kids, this is probably a step that an adult should do. Same for the next step.
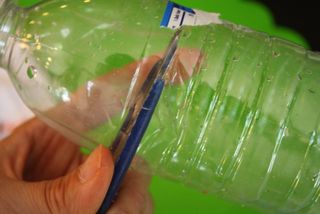
Step 6: Cut the smooth part out of the plastic bottle. I used kitchen shears for this part.
Step 7: With a foam brush, paint craft glue all over the plastic.
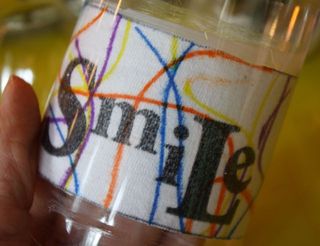
Step 8: Glue your "fabric" cuff onto the plastic, design side up. Let it dry then carefully cut it out along the shape of the tee-shirt material. To make the plastic "shrink" a bit, wrap it in a rubber band and put it out in the sun.
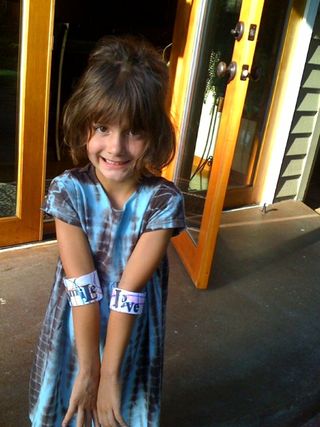
Here's Kira with her new cuffs on. Don't you love her dress too? The girl's stylin'!
Linking up to these fun parties
See you tomorrow for a great giveaway! BIG Hug… Malia
The Not-So-Fine Print: Yesterday on Tuesday is an affiliate of PurpleTrail.com.

Awesome! Totally cute and way to upcycle!
How much fun is this!!!!!
What a fantastic idea!!
=)
Very cute. I think the smile on the little girl says it all! Great idea!
What a fun idea! I love that it’s easy and painless too :)
I am following you back! Thanks for the follow.
Hehehe. Super cute!
Thank you for following me. I am glad to follow you too.
So creative! What a great blog! You have a new follower. Come visit Mama’s Little Chick.
Mama Hen
http://www.mamaslittlechick.com
I know some Daisy Girl Scouts who might enjoy this project! Thanks!
what a fun, practical craft to do with children – I can see it being popular with Brownies and in school groups:-)
Of course, the opening end of the bottle is a ready formed funnel, so I hope you didn’t throw that away!!
Christine’s Chatter is at
https://cadugdale.blogspot.com
My daughter would love this. I must try this. Really, really cute idea! I will be linking up to your party this week – last week was over the top CRAZY! It was all I could do to get tickled pink done!