Distressed Heart with Anchor Sign
Distressed Heart with Anchor Sign

Hello, I’m Amanda from Kaleidoscope of Colors. It is such an honor to be a guest today, I’ve been an avid follower for such a long time and some of my very first blogging projects were inspired by Malia. So I am just thrilled to be sharing this project.
My blog has lots of DIY, sewing and painting projects. Lately I’ve been in a painting mood so this Distressed Heart with Anchor was an idea I had for a gallery wall that I am working on in my home. This is very fun and you could most certainly change out the anchor for another shape, word or idea that you may have.
What you will need for this project:
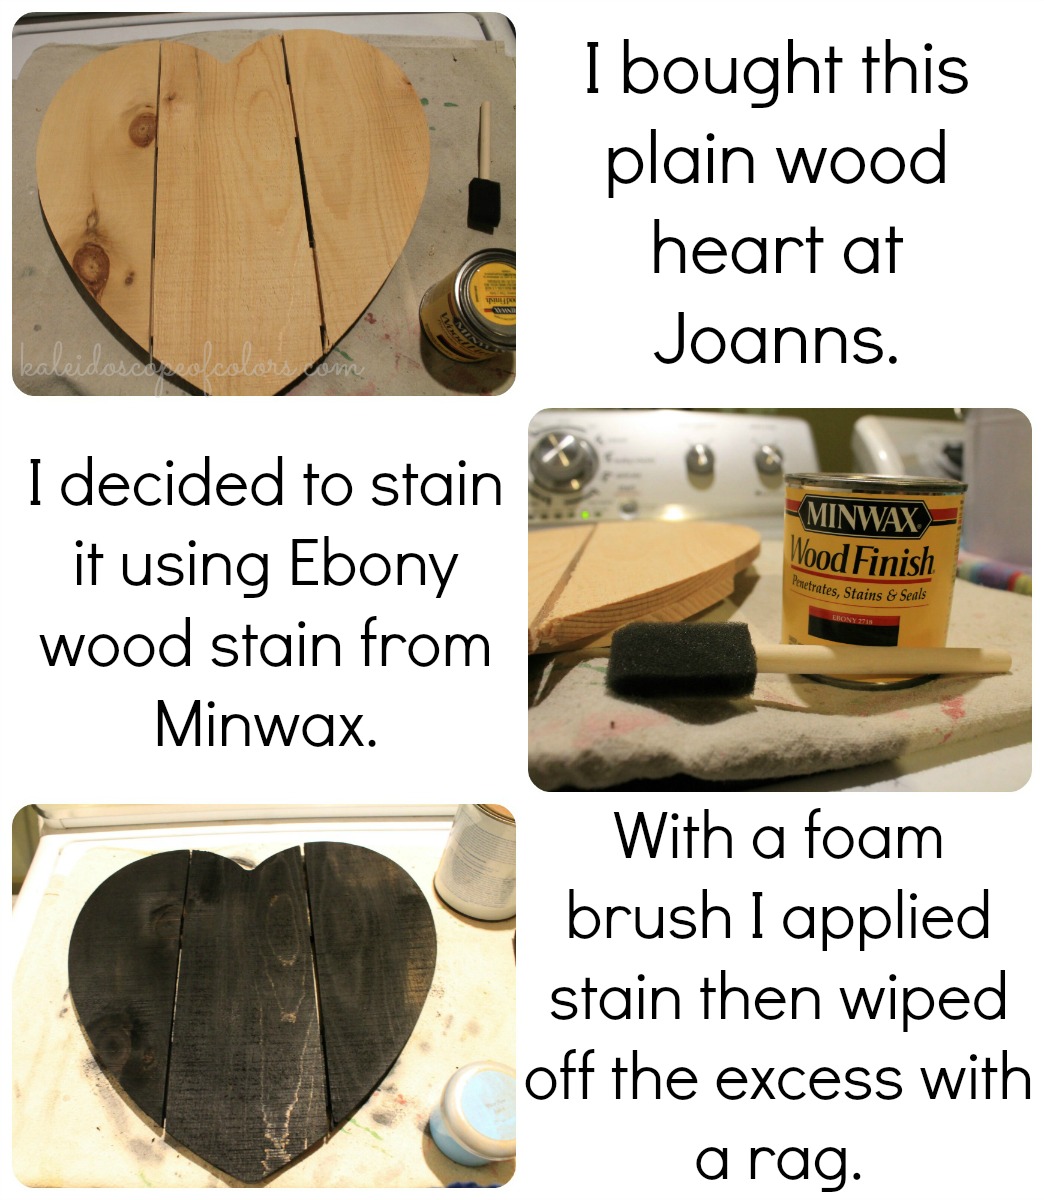
A wood rustic heart (mine was purchased from Joanns)
Wood stain ( I used Ebony from Minwax)
Two paint colors (Teal and White)
Contact Paper
Furniture wax or vaseline
Disposable paint brushes
Sandpaper block
Anchor Template found HERE
To start place heart on a surface you can get messy on. Apply the stain onto the heart with a foam brush, then wipe the excess stain off when it is completely covered. Let it set till dry. I let mine set for 24 hours to be sure.
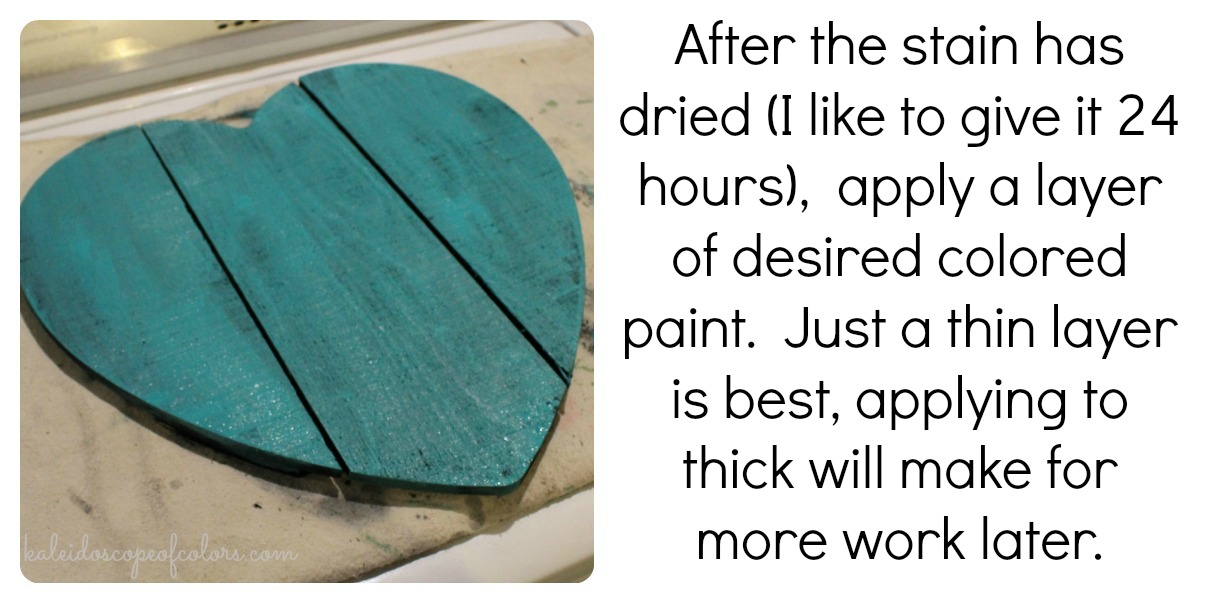
After the stain is dry, apply your first layer of paint. You can use craft paint or leftover paint from another project. I used some sample paints from the hardware store. (Check out the Oops! sections of Home Depot or Lowes)
This color will show through the top layer, so make it a shade that will really POP! A thin layer is just fine because you will be sanding it later. You can also add two colors if desired, the possibilities are endless.
While the paint is drying, print off the anchor template and place it behind the contact paper. *Contact paper from the Dollar store doesn’t really stick well to the wood, better quality paper from a hardware store works best. If all else fails, sometimes I use a spray adhesive to spray the shape to help it adhere to the wood.
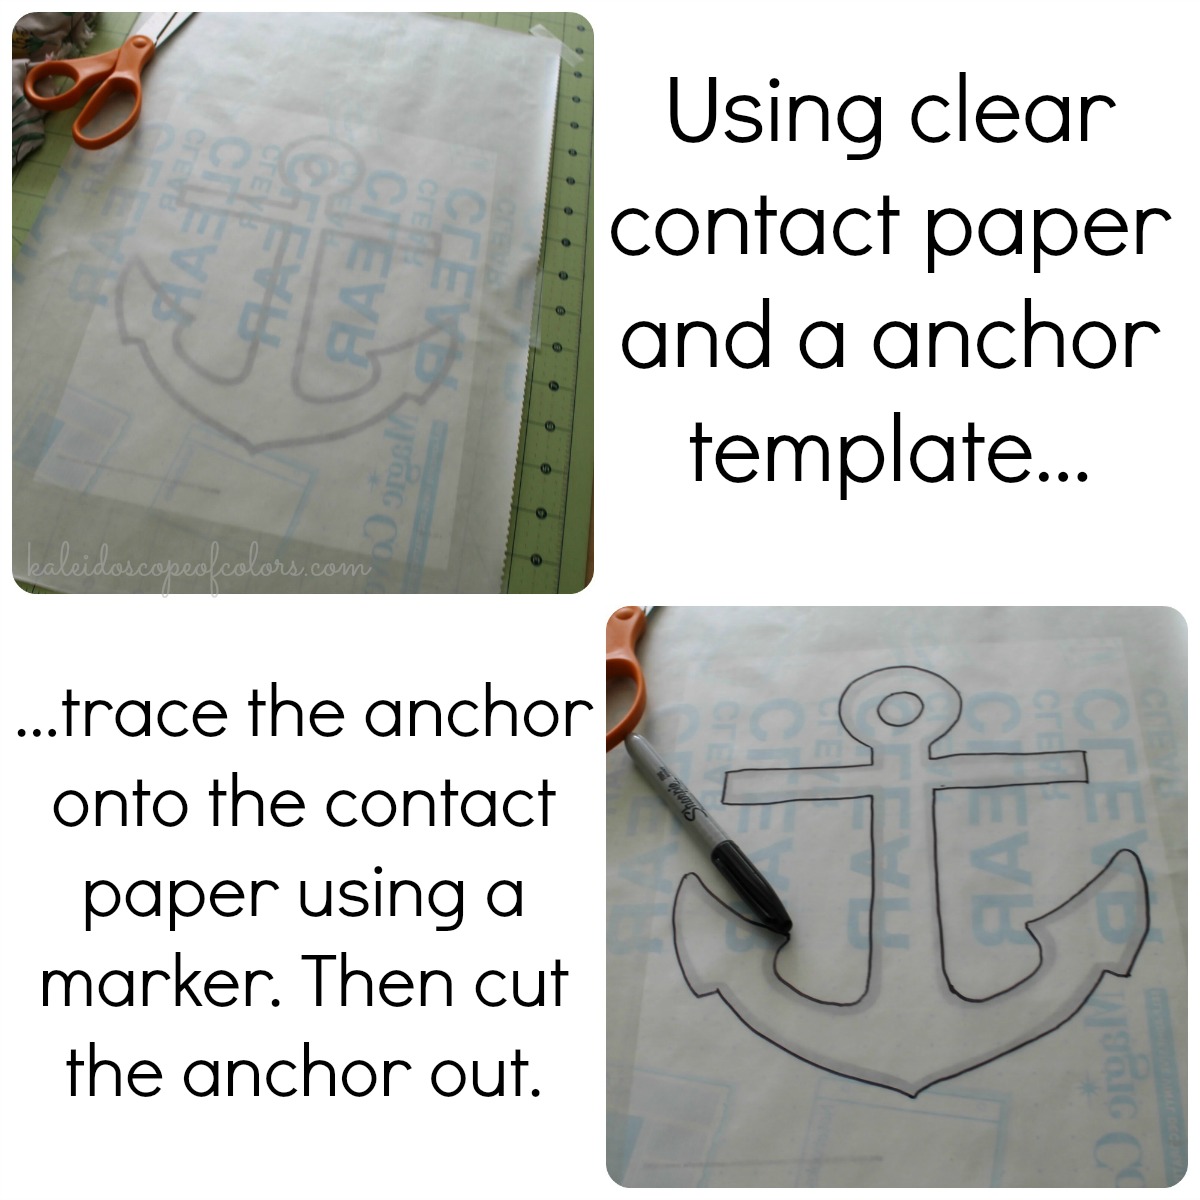
You want the clear side of the contact paper facing you, trace the anchor with a marker and cut out.
Peel off the contact paper backing and adhere to the heart. Press into the wood so that it is secure.

To make the distressing process easier, apply paste wax or vaseline with a rag to the areas where you want the paint to really come through clearly. *Be sure not to apply on the anchor.
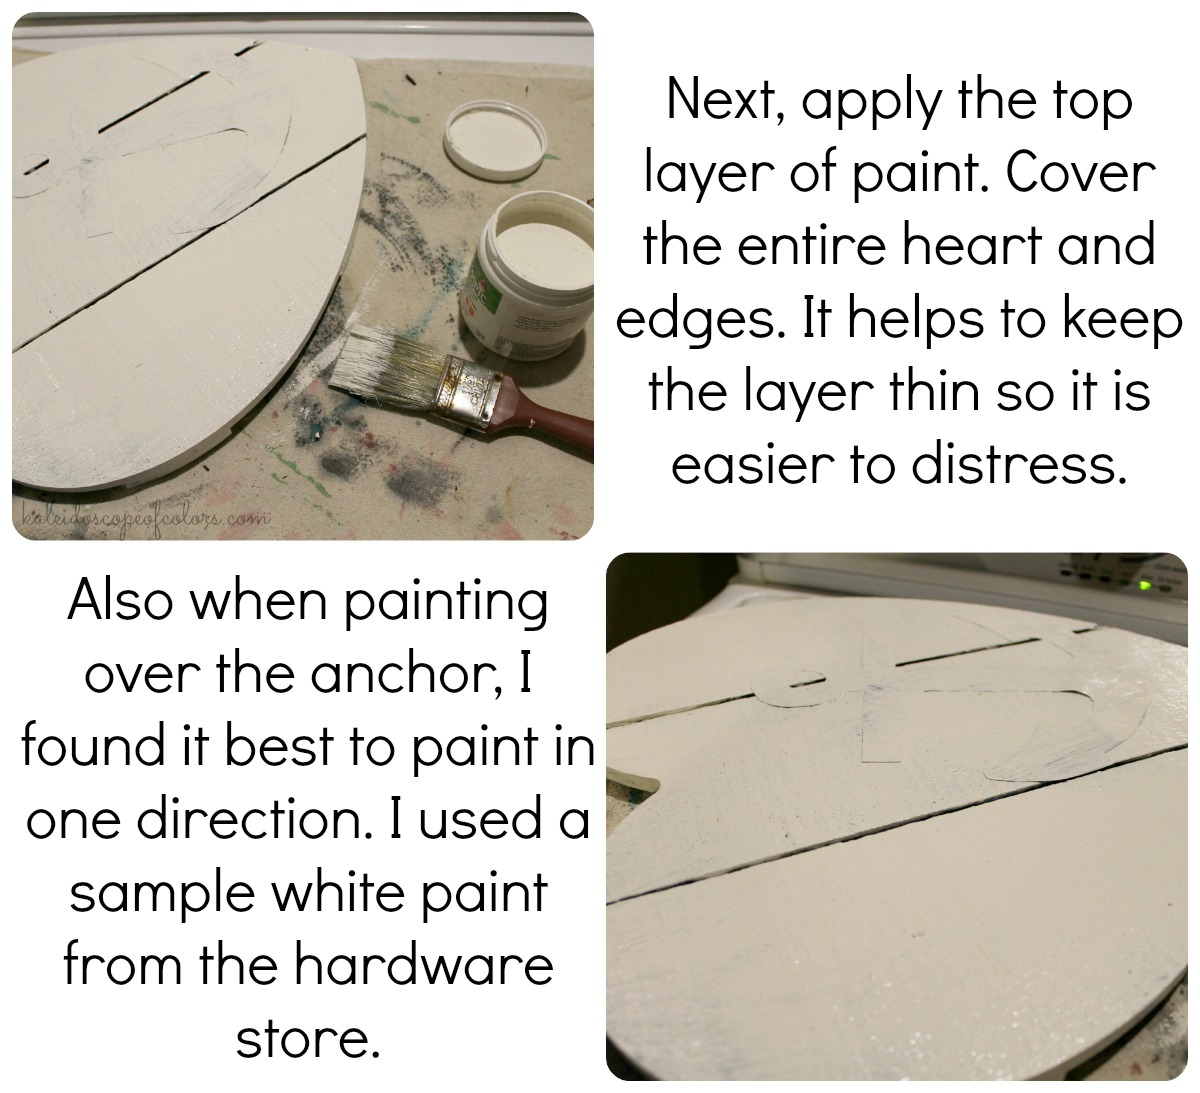
Then apply the top layer of paint, you don’t have to wait for the wax or vaseline to dry. Cover the entire heart and edges with the paint, a thin layer is best because you will be removing most of it in the distressing process. I used a sample white paint and it helps to paint over the anchor in one direction so that you don’t create large spots of paint on the anchor.
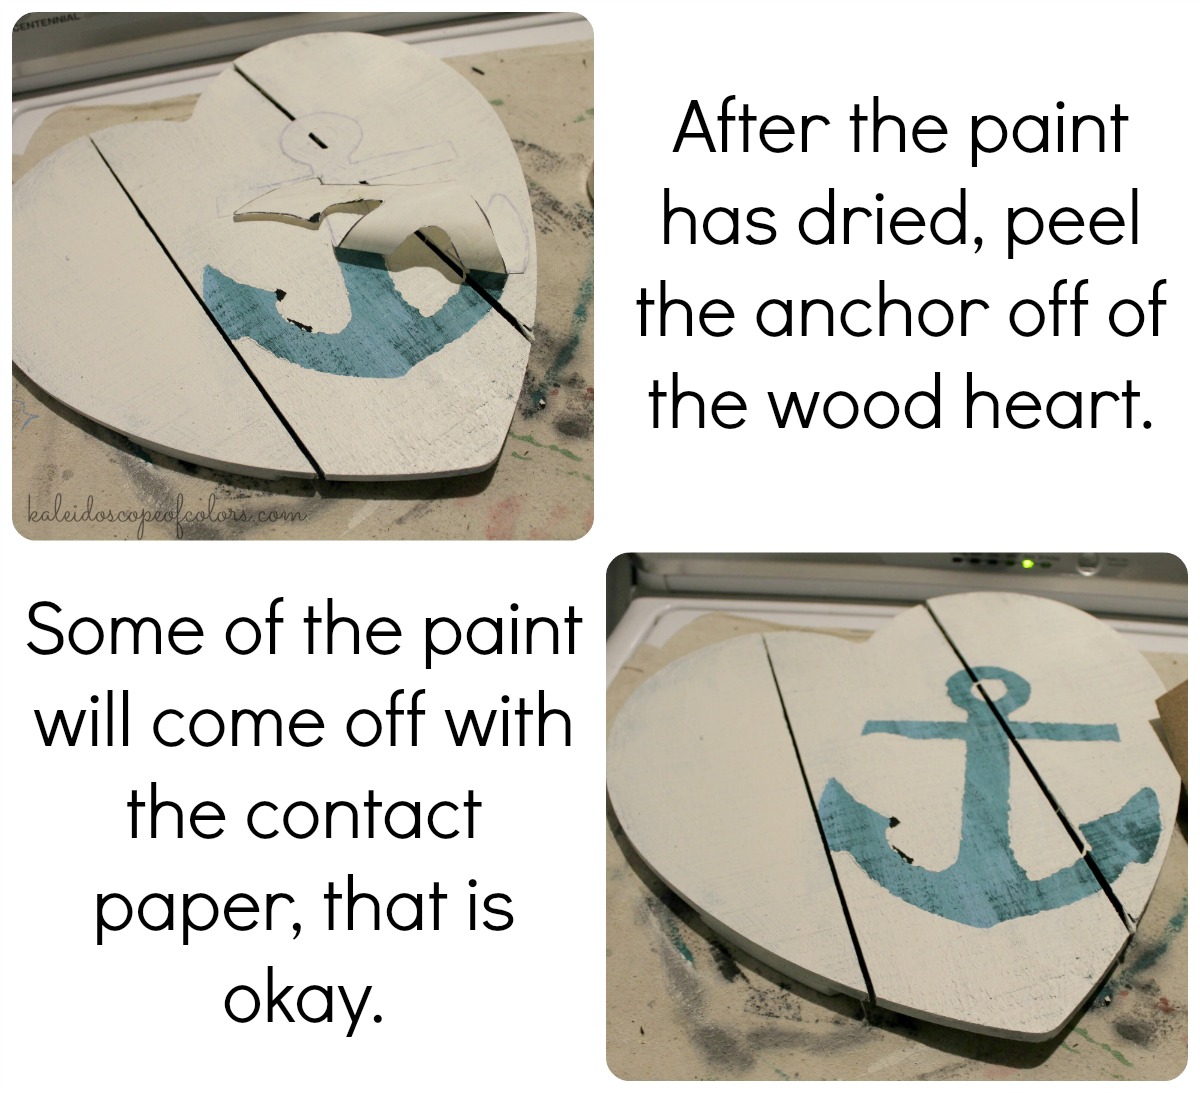
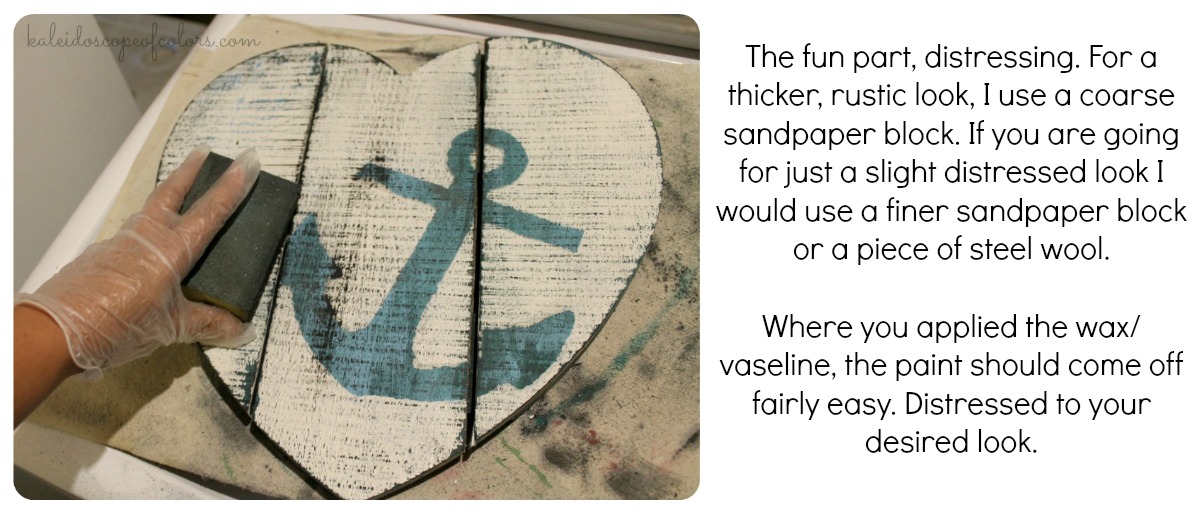
When the top layer is dry, peel off the anchor. Then begin distressing with a sandpaper block, for a heavier rustic look use a coarse sandpaper. For a finer more finished look use finer sandpaper or steel wool.
And viola! You have just created your own Distressed Heart Sign. It is super easy and lots of fun. The possibilities are endless, change the shape or add a favorite quote to give it a more personal touch.

I hope you enjoyed this project and it inspires you to create your own version. I’d like to especially thank Malia for inspiring me to create and letting me be a guest today. Be sure to stop by Kaleidoscope of Colors to see other great projects that I am sharing.
~Amanda


This is beautiful ~ I love the distressed look and the colors!
Mary Beth|Cupcakes and Crinoline recently posted…Easy to Make Dessert ~ Just 4 Ingredients
How cute!! Thanks for this wonderful tutorial… pinning to remember for a future project.
Diane | An Extraordinary Day recently posted…Project Inspire{d} #128 Weekly Link Party Extraordinaire