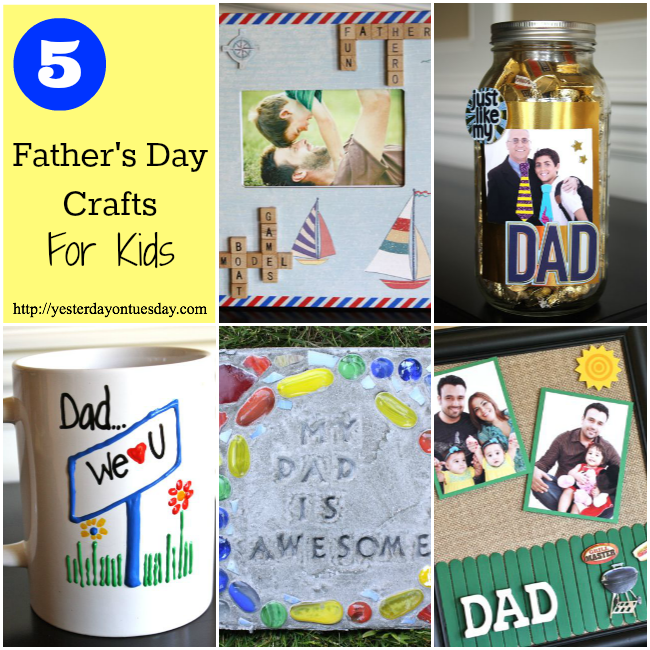
Fast and Fun Father’s Day Gifts
Catch these ideas LIVE on Seattle’s KOMO TV, Ch 4 on June 9th at 4pm
Fast and Fun Father’s Day Gifts
 Next Sunday is Father’s Day when we get to celebrate the special Dad in our lives. If you haven’t had a chance to buy or a gift (or the kiddos haven’t), here are some Fast and Fun Father’s Day Gifts you can create.
Stache Tray
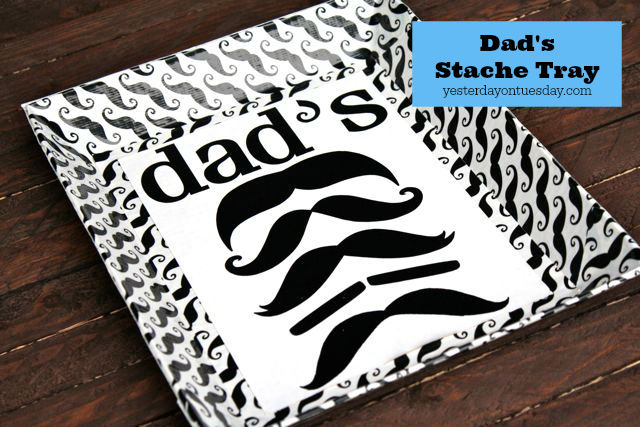
Dad can stash his stuff in this whimsical “Stache” Tray!
Supplies: Cardboard Tray, two sheets of Duck Tape in the “moustache” pattern and one in the plain white, vinyl letters “DADS”, vinyl moustaches, ruler and scissors or paper cutter. All materials available at Ben Franklin Crafts and Frames in Redmond.
Step 1: Trace the bottom of the tray on a sheet of the moustache patterns and cut out. Apply to “right side” of tray.
Step 2: Cut 4 strips of the moustache pattern, 2 inches wide for each.
Step 3: Apply strips to each side of tray.
Step 4: Cut the white sheet of Duck Tape 6 by 8 1/2 inches.
Step 5: Apply vinyl letters “Dad’s” to white sheet, as well as moustaches.
Step 6: Affix white sheet on “right side” of ray.
Remote Rest

Dad will never misplace his remote again, thanks to this cute Remote Rest!
Supplies: A small plain wooden chair, acrylic paint (we used Americana paint in Black Forest Green) and a small vinyl word (we used “Dad”). All materials from Ben Franklin Crafts and Frames in Redmond.
Step 1: Paint the chair. It will need two coats.
Step 2: After the paint is dry, apply the vinyl. Use a credit card to burnish the letters then place “Dad” where you want it to go and gently rub letters with a credit card.
Step 3: Remove paper and voila! Dad has a darling… I mean manly– “spot” for the TV remote!
World’ Best Dad Art
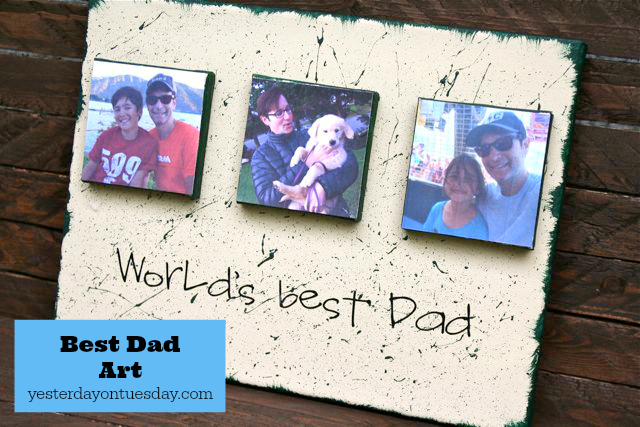
Dad’s THE BEST, right? Show him how you feel with this Canvas Best Dad Art.
Supplies: 12 x 9 inch Canvas, three 3 x 3 inches canvases, a vinyl saying, Mod Podge, Hot Glue, Americana Acrylic Paint in Sand and Black Forest Green, scissors, paintbrushes, a dry bristle brush and an old toothbrush. You’ll also need three photos or copies of photos. All materials available at Ben Franklin Crafts and Frames in Redmond.
Step 1: Paint the large canvas sable. Needs 2-3 coats.
Step 2: Using a dry bristle brush, paint the edges of the large canvas and three small canvases green.
Step 3: Make the paint splatter look on the canvas by dipping the old toothbrush in the green paint and splatter it on the canvas.
Step 4: Trip the photo to fit on the small canvases and use Mod Podge to adhere.
Step 5: Hot glue the three small canvases to the larger canvas.
Step 6: Apply vinyl.
Dad’s Treat Jars

Whether Dad likes to snack on peanuts or has a sweet spot for chocolate, he’ll enjoy getting his own treat jars.
Supplies: Plastic Jars, Scrapbook Paper (Marine Dot and Leaf Dot by Pebbles), a piece of plain White Scrapbook paper, double sided tape, a rule and scissors and of course… Dad’s favorite treat! You can use the Die Cut Center at Ben Franklin Crafts and Frames for free when you purchase your supplies there and show them the receipt. All materials available at Ben Franklin Crafts and Frames in Redmond.
Step 1: Use the necktie and bow tie die cuts at Ben Franklin.
Step 2: Cut two 2 inch strips from the white paper.
Step 3: Fill the jars up with treats.
Step 4: Use double sided tape to stick necktie and bowtie on jars.
Step 5: Use the tape to add the white “collar” on both jars. Trim if needed.
Hands Down Art
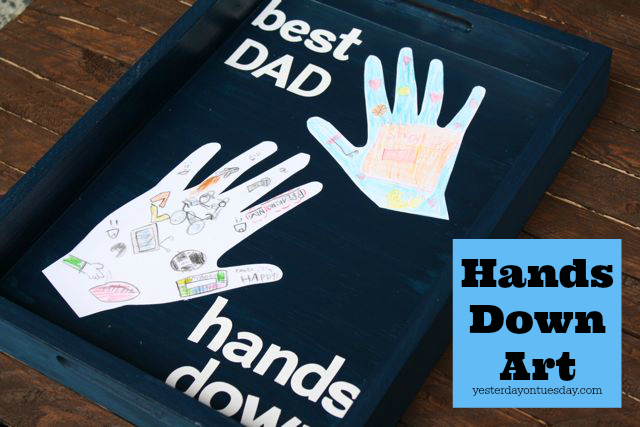
Give Dad a “high five” every time he sees this cool “Hands Down” art!
Supplies: Wooden Tray, Americana Acrylic Paint in Navy Blue, two sheets of white scrapbook paper, colored pencils, Mod Podge, white letter stickers. All materials available at Ben Franklin Crafts and Frames in Redmond.
Step 1: Trace kid’s hands and cut out. Let kids decorate hands with their favorite things they like to do with Dad.
Step 2: Paint the tray navy and let it dry (three coats).
Step 3: Use Mod Podge to glue hands down.
Step 4: Add letter stickers
Step 5: Brush a think coat of Mod Podge all over tray
Magnetic Father Frame
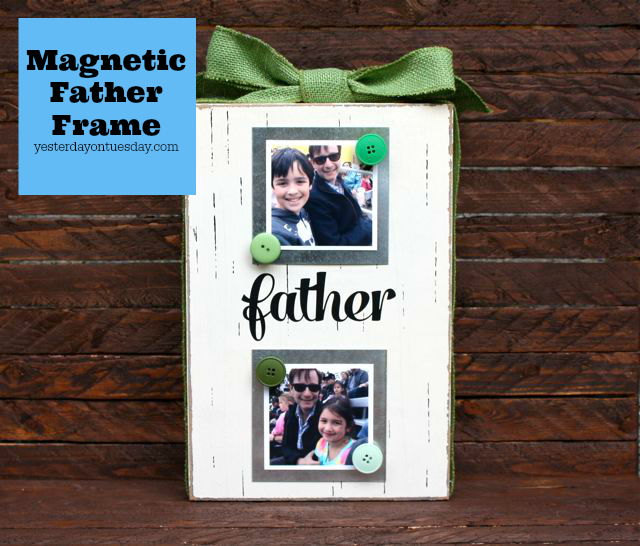
Dad will love showing the kids off with these simple Magnetic Photo Frame.
Supplies: White Wooden Block by Sierra Pacific Crafts, two metal squares, four plain magnets, four green buttons, Green Burlap Ribbon by Sierra Pacific Crafts, vinyl “Father” and hot glue. All materials available at Ben Franklin Crafts and Frames in Redmond.
Step 1: Apply vinyl “Father”
Step 2: Hot glue magnetic squares on box
Step 3: Using hot glue again, attach magnets and buttons
Step 4: Run burlap ribbon around box and make a bow use hot glue to hold in place.
Step 5: Add photos
For more Father’s Day ideas, check out this post:
Sharing at Uncommon Designs, Craft-o-Maniac, I Should Be Mopping the Floor, A Bowl Full of Lemons, Kathe with an E, The Girl Creative, Domestically Speaking, Live Laugh Rowe, Thirty Handmade Days, Carolyn’s Homework, Tatertots and Jello, Shaken Together Life, Flamingo Toes and The Cards We Drew.


Thanks so much for featuring my Nautical Print! Loving the entire Nautical collection!
Michelle @ Elegance & Enchantment recently posted…Motivation Monday – Free Printable – Pablo Picasso
Such cute ideas! Thanks for sharing these.
Bonnie @ Uncommon Designs recently posted…Fourth of July Fun and Games Station
Thanks Bonnie. Hope you guys have a fun Father’s Day!
Great ideas! I always have the hardest time buying something for my dad. I love handmade gifts because they feel more personal and special. :)
Megan recently posted…Final Lighting Selections
I agree Megan! xo
These are such great ideas, Malia! Thank you bunches for linking up and partying with us! Pinning this!
Thanks Kristi. Hope you and your family have a great Father’s Day!
Great gift ideas!
Jess @ Chaos & Love recently posted…Blog Talk Thursday | Favicons
Thanks so much Jess!
Super fun ideas. Loving the treat jars :) Thanks so much for sharing!
Kelly recently posted…Party Time from St. Maarten | live laugh linky #116
Thanks Kelly! Hope you are having an amazing vacation!
These are awesome! Love them all!
Debbie
Debbie recently posted…Opening New Doors