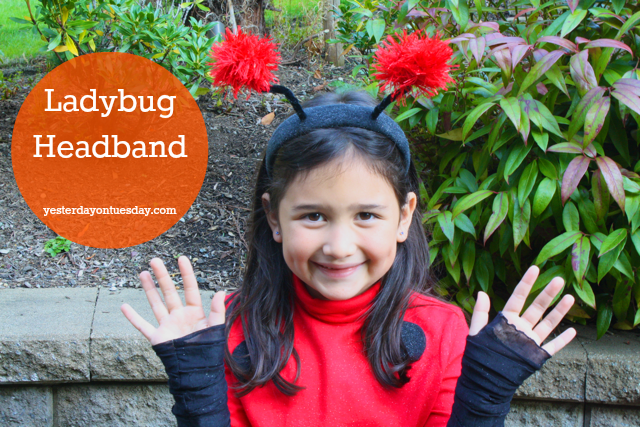
DIY Ladybug Costume
{DIY Ladybug Costume}

Hi Pals! I’ve got another awesome 99% no sew costume for you, thanks to my friend Tracy Gonzalez. This time, it’s a sweet ladybug costume! There are quite a few darling DIY elements.
Costume: A red turtleneck, red tights and back shoes.
What about the stuff you can make? Let’s start at the top– literally… with the headband!
Ladybug Headband
Supplies: Headband, glue, glue gun, fabric, black pipe cleaners, craft garland, glitter spray. All materials from Ben Franklin Crafts and Frames in Redmond.
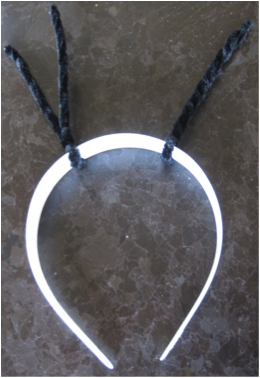
Step 1: Take four black pipe cleaners and twist two together and fold in half. Once they are twisted wrap them around the top of the headband spacing them out about three inches apart. Twist them around so they are tight on the headband.
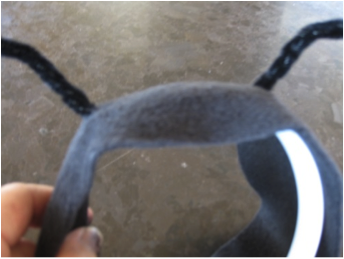
Step 2: Cut black fabric roughly a half an inch wider and longer than your headband
Step 3: Once the pipe cleaners are in place, lay fabric down on table and mark in the center of your fabric, roughly where the pipe cleaners will poke through using a white pencil crayon. Use an x-acto knife to make tiny slits for each antenna to poke through.
Step 4: Poke the antennas through the holes and then get ready to cover the headband with the fabric.
Step 5: Using a hot glue gun tack one end of the headband and then the other making sure to pull the fabric tight. Once that is complete, glue the other side. Tip: you may want to trim the fabric slightly so there is a smooth seam.
Step 6: Using the glue gun glue one side of the fabric to the back of the headband and then flip it and glue the other side.

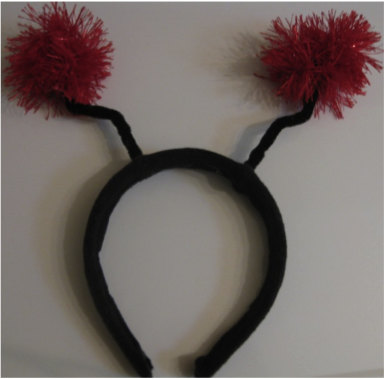
Step 7: Once the headband is covered use either this furry string to wrap and secure with spots of hot glue until it makes a pom pom or antenna looking thing. Spray with glitter spray. Tip: to make things easier you could use a red pom pom. All materials from Ben Franklin Crafts and Frames in Redmond.
Ladybug Shirt
Supplies: Red Shirt, small glass, black fabric, white pencil
Step 1: Take a small glass and trace a circle onto black fabric using a white pencil crayon
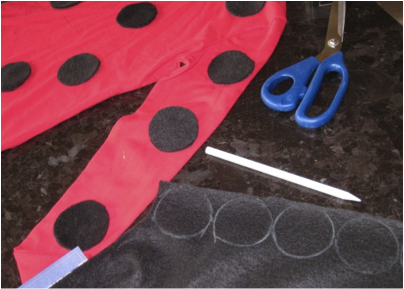
Step 2: Trace a bunch of the them and cut out using sharp scissors
Step 3: Arrange them on the red shirt and use fabric glue to glue them to the shirt and if desired red tights.
Ladybug Skirt
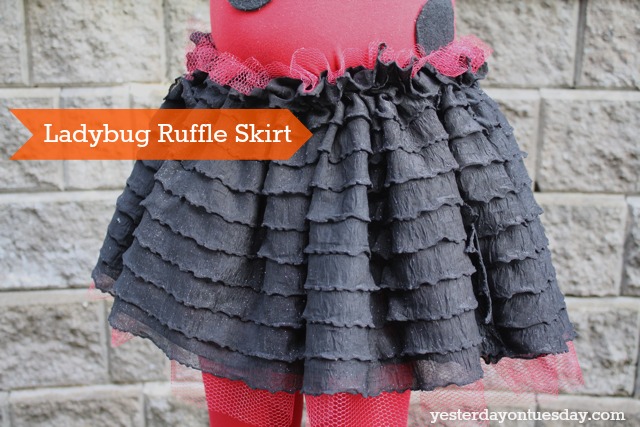
Next up, the skirt! Tracy made this one in ladybug colors, but you could do it in any shade(s)!
Supplies: Red tulle, black fabric x-acto knife, black elastic, construction paper, white pencil crayon, and ruler. All materials from Ben Franklin Crafts and Frames in Redmond.
Step 1: Cut 2 lengths of red tulle fabric roughly 12 inches long, cut 2 lengths of black fabric roughly 11” long

Step 2: On a piece of construction paper, measure one inch all along the paper and draw a line. Then measure another inch below and draw a line. Then measure one inch marks all along the construction paper.
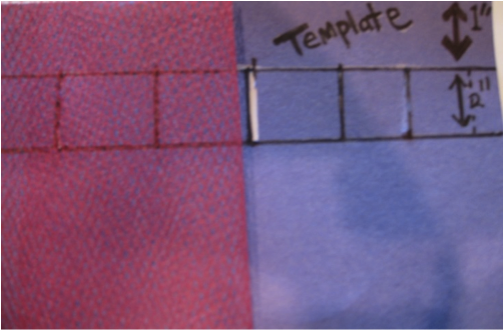 This is what you will use to set up your grid to make your no sew skirt. Once your grid is drawn, take your fabric and lay it flush with the top of the paper.
Step 3: Using an x-acto knife cut one inch slits along the red tulle. Do both pieces of tulle.
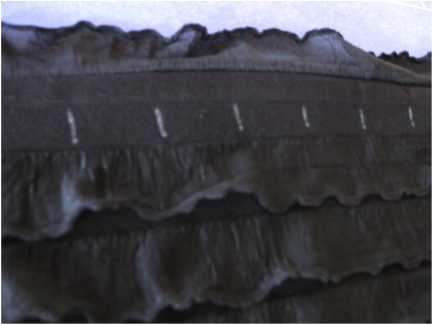
Step 4: Cut two runs of the black fabric 11” long. Measure one inch down and mark one inch notches starting at one end of the fabric to the end.

Do this on both pieces of fabric using a white pencil crayon. Once all the slits are made use an x-acto knife to cut the slits.
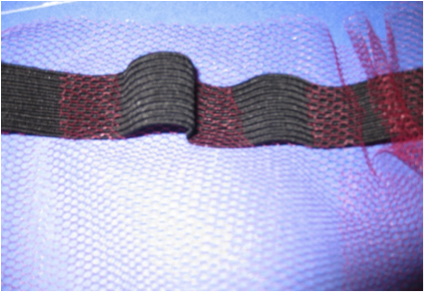
Step 4: Using the black elastic, weave both the red and black fabric through the one inch notches together. Weave one black and three red, then repeat until all the fabric is on the elastic. The red tulle if woven more than the black makes the red part of the skirt fuller than the black one.
Tip: As you weave both color fabrics onto the elastic, make sure you push both along to make way for all the fabric to fit, be gentle not to tear the fabric. Once it is all woven on, measure it on your child’s waist and hand-sew your elastic shut.

Step 5: Slide the fabric over to cover up the staple or sewing and use the fabric glue to close the black fabric so it has a finished looked.
Step 6: Spray skirt outside with glitter spray.
There’s more DIY Costume fun to coming soon!
Sharing at these great parties.


That is absolutely the cutest ladybug costume I’ve ever seen!!! What a sweetheart!
Michelle recently posted…Minnie Mouse Party
Thank you Michelle! I really appreciate your kind comment. Have a wonderful weekend!