6 Cool No Carve Pumpkin Ideas
Catch these ideas LIVE on KOMO-TV, Monday Oct 20th at 4pm
6 Cool No Carve Pumpkin Ideas
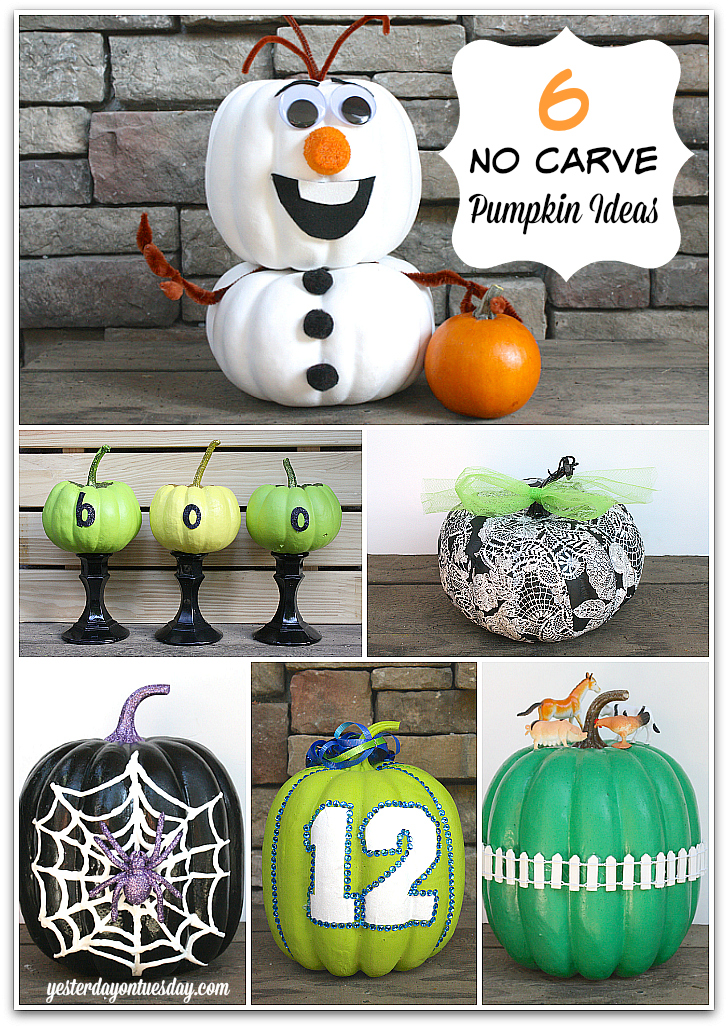
Forget about carving tools and messes… there are so many fun ways to decorate a pumpkin!
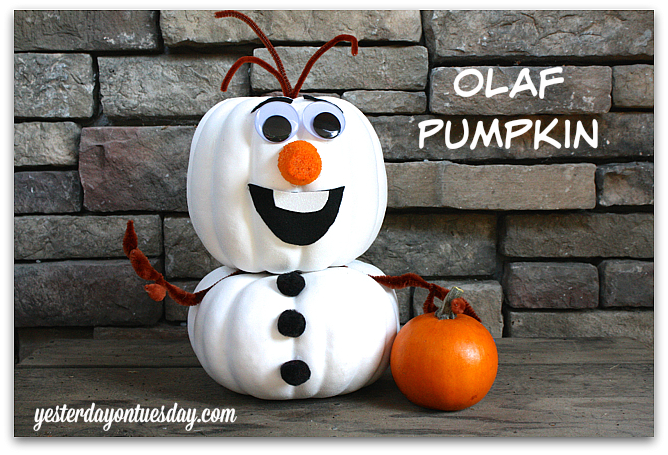
Olaf Pumpkin
Supplies: One oval and one round pumpkin (faux or real), Design Master Spray Paint in Flat White, Design Master Spray Paint in Orange, large pair of googly eyes, small styrofoam cone by FloraCraft Make It Fun, black felt, white adhesive glitter paper, 3 plain brown chenille stems of head and 4 fluffy brown chenille stems for arms. You’ll also need a glue gun and glue sticks. All materials available at Ben Franklin Crafts and Frames in Redmond.
Step 1: Remove the stems. If using faux pumpkins, you can pop them right out.
Step 2: Spray paint the pumpkins Design Master White. Let them dry.
Step 3: Spray the pumpkins with the Krylon Glitter Blast. Let them dry.
Step 4: Cut the end piece from the styrofoam cone and spray paint it with Design Master Orange.
Step 5: Using the photo as a guide, cut a “mouth” from the black felt. Cut “teeth” from the adhesive glitter paper or from white felt or white paper. Attach “teeth” to mouth and use hot glue to secure to top pumpkin.
Step 6: Using photo as a guide, adhere carrot nose to the top pumpkin.
Step 7: Use hot glue to attach eyes.
Step 8: Cut two small eyebrows from black felt and glue above eyes.
Step 8: Cut the two plain chenille stems in half. Use the hot glue to attach them to top of “head” pumpkin.
Step 9: Cut one of the brown fluffy chenille stems in fourths. Twist one fourth around another chenille stem to make an “arm.” Trim arm as needed and glue to smaller “bottom” pumpkin. Repeat on other side.
Step 10: Glue top and bottom pumpkins together with arms sticking out.
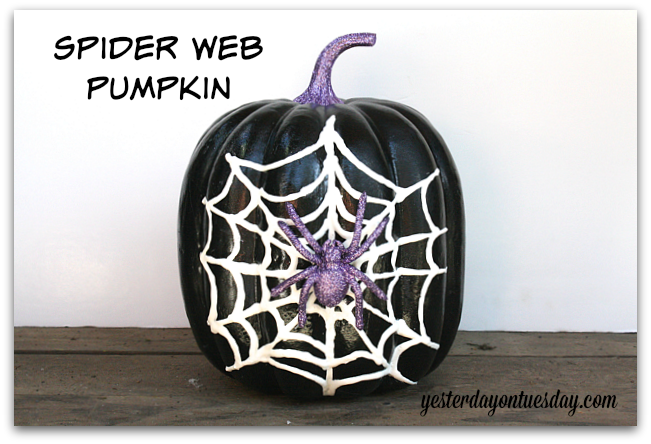
 Spider Web Pumpkin
 Spider Web Pumpkin
Supplies: faux or real pumpkin. Design Master Spray Paint in Glossy Black, white Dimensional (Puffy) Paint from Tulip, a large spider and hot glue. Optional: Design Master Spray Paint in Purple. All materials available at Ben Franklin Crafts and Frames in Redmond.
Step 1: Spray paint the pumpkin glossy black and let it dry.
Step 2: Use puffy paint to create a spider’s web. The easiest way to is to make an “L” shape, then add two more dimensional lines. Now you have a quarter done. Repeat three more times. Use the puffy paint to draw webs between the lines. Let the puffy paint set for 24 hours.
Step 3: If desired, spray paint the spider purple.
Step 4: Use hot glue to add spider to web.
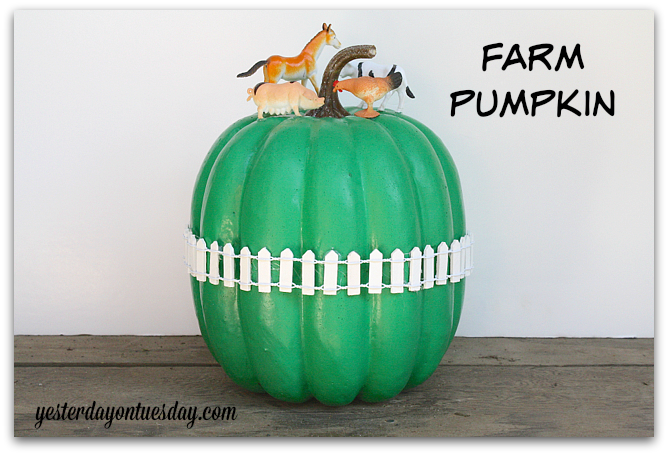
Farm Themed Pumpkins
Supplies: faux or real pumpkin. Design Master Spray Paint in Holiday Green, two small “fences” by Darice (available in the area where the train models are sold), one package or plastic farm animals, and hot glue. All materials available at Ben Franklin Crafts and Frames in Redmond.
Step 1: Spray paint the pumpkin green. Let it dry.
Step 2: Attach one fence to the middle of pumpkin. Measure how much more fence you need and cut the second fence accordingly. Glue in on.
Step 3: Glue some small plastic animals on top.
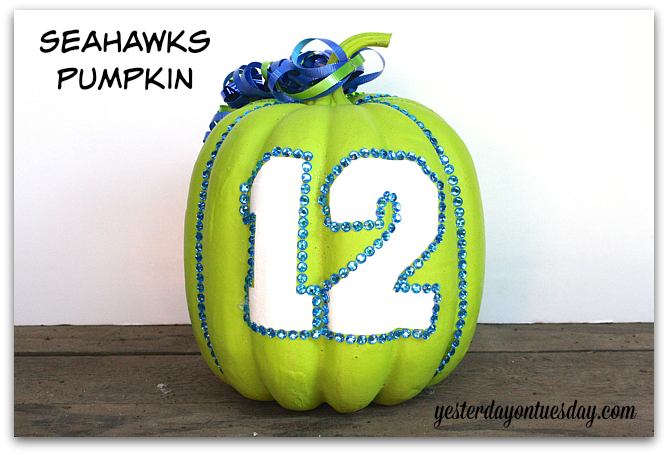
Seahawks Pumpkin
Supplies: faux or real pumpkin. Design Master Spray Paint in Olive. 2 packages of bright blue adhesive gems from Triveni Craft and 2 packages of light green adhesive gems from Triveni Craft. White vinyl “12,” Mod Podge and fine white glitter. All materials available at Ben Franklin Crafts and Frames in Redmond.
Step 1: Paint the pumpkin with Design Master Spray Paint in Olive.
Step 2: Add white vinyl “12.”
Step 3: Brush 12 with Mod Podge and add white glitter.
Step 4: Decorate with adhesive rhinestones.
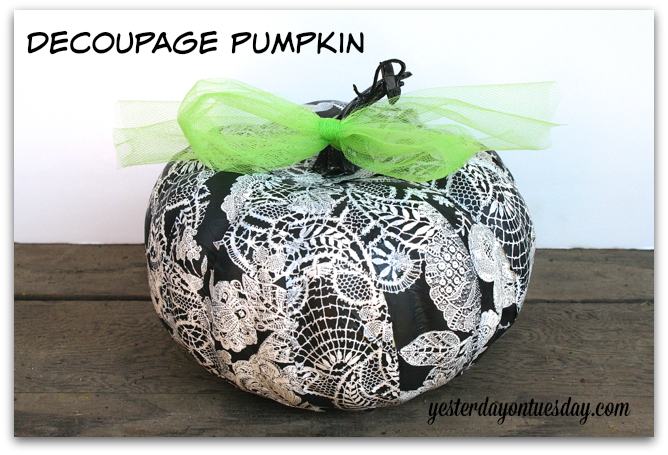
Decoupage Pumpkin
Supplies: Faux or real pumpkin, Mod Podge, decopatch and scissors. Optional: Design Master Spray Paint in Glossy Black and hot glue. All materials available at Ben Franklin Crafts and Frames in Redmond.
Step 1: Remove stem and (optional) spray paint Glossy Black.
Step 2: Cut the decopatch in 2 inch wide strips.
Step 3: Apply Mod Podge on the back on a strip and adhere to pumpkin. Continue around pumpkin until totally covered.
Step 4: Snip the bottom off the stem an reattach using hot glue.
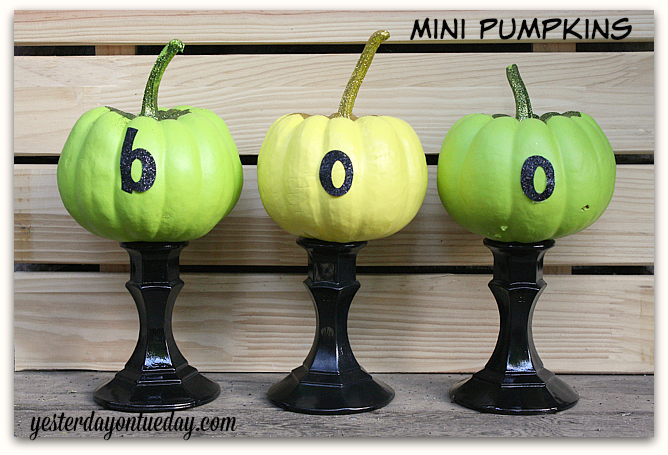
Mini “BOO” Pumpkins
Supplies: Three baby pumpkins, Design Master Spray Paint in Olive and Yellow, Mod Podge, black letter stickers, a foam paint brush and green and yellow glitter. All craft materials available at Ben Franklin Crafts and Frames in Redmond.
Step 1: Spray paint the pumpkins (I did two green and one yellow) and let them dry.
Step 2: Paint Mod Podge on stem and tops of pumpkins. Add glitter and let dry.
Step 3: Add letter stickers.

I am so IN LOVE with these ideas. Every year, I get so excited to carve and think I am going to do better than the year before and well, I just end up so frustrated and ugh… disappointed! Everyone else in my fam can carve… I will come back to these ideas.
Sharon from herorganizedchaos.com
Thanks Sharon. I am with you. I get high hopes for the carving but sadly my carving skill isn’t that good. Painting is much easier and it lasts forever!
Paint… and glitter :)
LOL!
I love all these crafts! Olaf pumpkin is so adorable!I think I’ll try to make one for this Halloween! Just pinned!
Aww thank you. The Olaf one is really easy. If you make it and have time to send a photo, I’d love to see your Olaf.
These are SO fun, Malia – love that cute green farm pumpkin and those mini BOO pumpkins!! You are just so creative!!
keri @ shaken together recently posted…Hocus Potion Halloween Drinks
Thanks Keri! Right back at ya! I am a big fan of yours.
These are so cute!! I love the Olaf, and the 3 little pumpkins with boo, and I’m partial of course to the 12! They’re all so fun. :)
Sharon B. recently posted…Family Room Fireplace Makeover: Before & After
Hi Malia, I LOVE the Olaf pumpkin. Great post-Pinned! :) -Katie @ALittlePinchofPerfect
Katie Pinch recently posted…Sensory Pumpkin Decorating
I love the Olaf pumpkin it is so cute but I think my kids would love to decoupage one.
AmieJo recently posted…Real Life Is Really Messy
The cute Olaf and Spider pumpkins are my faves I’ve see so far this year for sure! :)
Amanda @artsy_momma recently posted…Spookley the Square Pumpkin Craft Magnets
Thanks so much Amanda!
These are all so awesome! Olaf is my favorite :)
Kayla recently posted…Caramel Apple Cider Donuts
Thanks Kayla!
Malia,
That Olaf pumpkin has got to be one of the cutest I have seen! PINNING IT :)
Jenny @ RenovarDesign.com
Thank you Jenny, that is so kind!
Have I told you recently that you are amazing!?!?!? =)
I want to do the olaf pumpkin but seem to be running out of time with all my other projects I want to do. hahahha!! Working full time is for the birds.
Oh my gosh, thanks Tina. YOU are so creative. I hope you are still loving Hawaii! How’s Ethan!
I think Olaf is my favorite but I’m also loving the Seahawks pumpkin. Haha. I hope your having a great day!
Leslie recently posted…Pet Peeves
Thanks Leslie! I hope you have a great weekend!
These are ridiculously cute and so creative. Pinned!
Jill recently posted…Bourbon Caramel Apples
Thanks so much, Jill!
Visiting from the TT&J link party and I just needed to say that that is the cutest Olaf pumpkin ever! My kids would love that!
Thank you, Alex!!! Really appreciate it.
Awww, love the Olaf pumpkin!! So cute :D Found you through the Monday Funday party!
Emily @ Two Purple Couches recently posted…Italian Sausage and Tomato Soup
Thanks Emily! So happy to meet you! xo
Such great ideas! I can’t get over how awesome the Olaf pumpkin is!
Christie recently posted…Sea themed Fabric book! (part 2)
I love all your pumpkins. The Olaf one is my favorite! So cute!
Erin @ Making Memories recently posted…Trying to Make a Difference – Our Next Big Adventure
OMG I LOVE the Olaf pumpkin!! How adorable! :) Looks doable for a craft-challenged person like me too, which is a big bonus! Gotta do this asap!
Anna @ Sunny Side Ups recently posted…Dark Chocolate Coconut Protein Smoothie
Hello sweet lady! This looks so amazing. Pinned. It was the Jessica’s favorite from our last party! Woo Hoo! We will be featuring your recipe at our party on Monday night. I hope to see you there.
Happy Saturday! Lou Lou Girls
Kimberly recently posted…Homemade Hero Rolls